Make your own wrapping paper

IMG_5373Wrapping up your carefully selected Christmas presents can often be a bit of an afterthought and that’s before you even think about the added cost of ribbons and bows. This year how about making your own gorgeous wrapping paper for a fraction of the cost. It’s the perfect craft for adults and children alike and the end result is really only limited by your imagination.

What you’ll need:

Brown paper (buy in a roll from a stationary store)
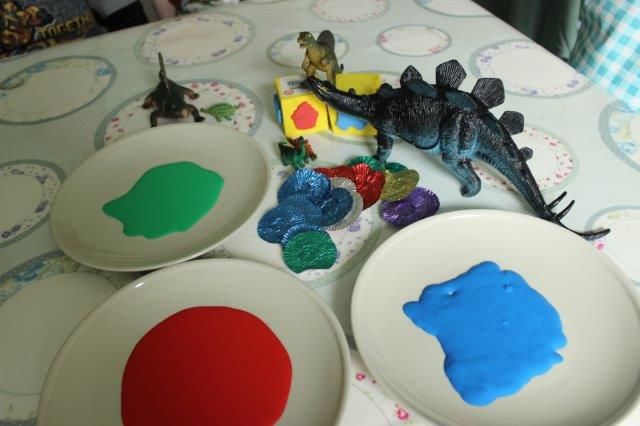
Paint

Stamps

Clean sweetie wrappers

IMG_5345Method

Grab an apron and protect your work surfaces then begin by cutting lengths of brown paper and laying onto a table. Note. You may need to secure the corners if the paper starts rolling up.

The exact design of your wrapping will depend upon your own preferences and whether this is a craft intended for adults or children. As my youngest has an impressive collection of plastic dinosaurs we decided these would make the perfect printing tools.IMG_5366

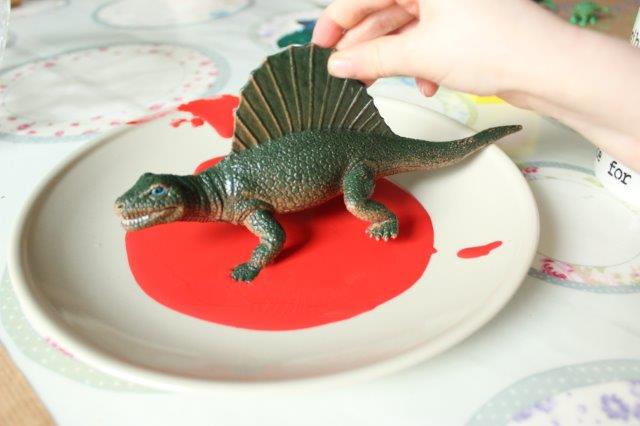
Many household items make wonderful stamps. Pennies are great for rolling along their edge, old cotton bobbins make interesting circular shapes, even potatoes can be cut in half and a stamp carved out. As long as you’re using washable paint then it’s worth trying out a few things until you achieve an effect that you’re happy with.

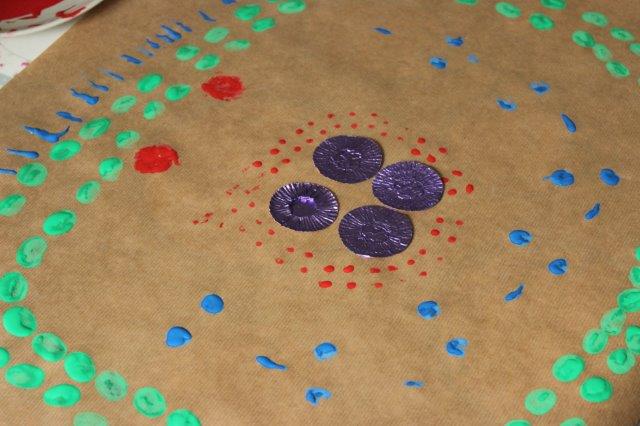
Squeeze some paint out onto some plates and then get dipping your stamps! We had dino footprints walking in tandem all over the place. IMG_5354

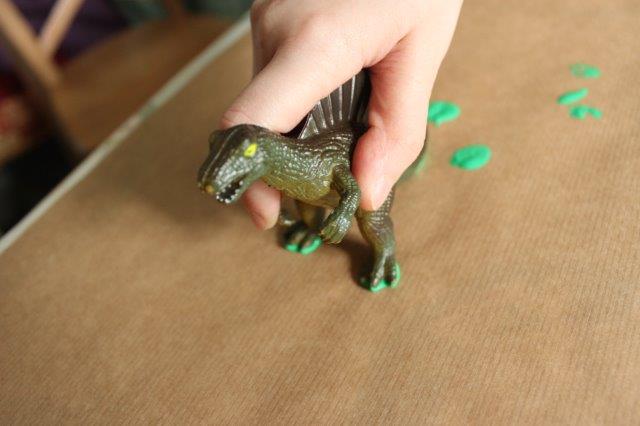
To add a bit of glitz we stuck clean sweetie wrappers onto our paper but glitter or stickers would also work well.

Leave the paper to dry out completely.

Now you should have some wonderful personalised paper that any recipient would be grateful to receive. It’s especially good for relatives who really appreciate the time and effort that’s involved.
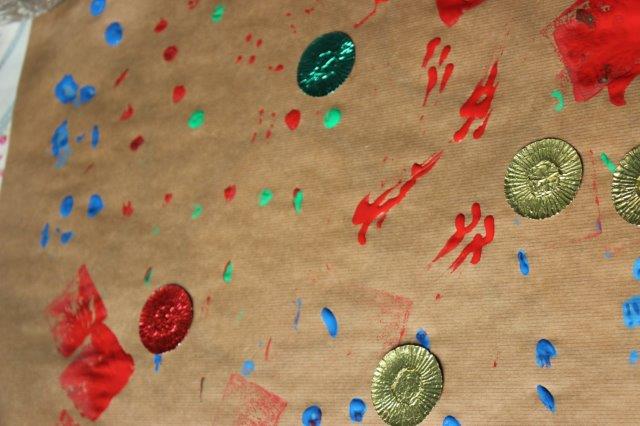
IMG_5372


Inkodye Printing

I recently read an article in the Mollie Makes magazine about a really unique printing ink called Inkodye and I instantly wanted to have a go.  Unfortunately there is currently only one company in this country that stocks it www.firstcall-photographic.co.uk and the postage is quite high but I felt really impatient to try it out!

Inkodye comes out of the bottle colourless, you then apply it with a brush and then leave it to the sun to develop, almost like a fabric photograph. In theory it allows you to create beautiful prints using anything that casts a shadow. Of course I bought it in the winter when sunlight is sparse but I have still managed a few goes with it. At present it only comes in three colours: red, orange and blue, but you can mix them so it’s not too restrictive.

My first attempt was using the red, I placed some old keys onto a small bag which I put outside for about 45 minutes. There wasn’t really enough light so it turned out pink and I don’t think I painted enough dye onto the fabric either.

My next attempt was using the blue and the same old keys. This seemed to go a dark colour very quickly, so I panicked and washed the ink out too early and again it was rather pale.

Once your piece has developed the depth of colour you desire you have to wash it really well otherwise it continues to develop! I washed the blue bag by hand (really scrubbing it) and then put it through a machine wash. Despite this after leaving it on my table folded in half for a few days I noticed that it had still continued to develop and one half was darker and some of the keys had started to turn blue 🙁

My third attempt was more successful. I cut some shapes out of cereal box and put a sheet of glass over the top to weight it down. I left it outside for one and a half hours but again there was not much light. The mistake I made with this one was washing my brush in my white kitchen sink and finding later in the day that I now have an orange and white sink!!!

Dyed sink aside I’m very pleased with the third piece and how it turned out. I think Inkodye is going to take me a little while to completely perfect but it’s definitely worth a try if you’re interested in trying out a new form of printing. Just remember my top tip…. wash that ink out until you can wash no more! Otherwise be prepared to see further colour development 🙂

Freezer Paper Printing Tutorial!

If you’ve ever fancied printing your own designs onto fabric or clothing, then you will love today’s tutorial. Freezer Paper offers a  wonderful world of craft ideas from clothing to quilts. Simply put, you cut it to make a stencil which is then ironed onto fabric in order to print/paint your chosen design. It’s far more common in the US, but here in the UK it can be ordered from many online craft shops. For those unfamiliar with the process I have created a simple and quick tutorial.

What You’ll Need

  • Reynolds Freezer Paper
  • Pencil
  • Craft knife or Scissors
  • Fabric Paint
  • Brushes
  • Iron

Step 1

Start by creating your design. Ours is a robot version of Sean Eskimo (affectionately called Sean Eskibot). You can either draw or trace your design onto the freezer paper, or it is possible to cut it and print straight from your computer (print the design onto the matt side of the paper). Cut out using a craft knife or scissors.

Step 2

Place your stencil shiny side down onto your tshirt/fabric and iron into place. The Freezer Paper will cling on making it super easy to apply the fabric paint. Using a big brush gently apply the fabric paint onto the stencil. Depending on the brand of paint you may be advised to fix between layers. This is normally achieved by placing a cloth over your stencil and ironing on top (make sure the paint has dried first!).

Step 3

Once you have built up the correct depth of colour let the paint dry and then fix according to the packet instructions. Now the fun part! Slowly start to pull off the Freezer Paper beginning at one corner, your masterpiece is finally being revealed!

Tips

I like to wash the finished designs once before wearing, this returns the fabric to it’s normal softness. It also ensures that the paint has properly adhered, if any comes off just top it up and fix again.

You can create multilayer stencils and build up a design using several layers of colour. Just make sure each layer is dry and fixed before you start the next.