Freezer Paper Printing Tutorial!

If you’ve ever fancied printing your own designs onto fabric or clothing, then you will love today’s tutorial. Freezer Paper offers a  wonderful world of craft ideas from clothing to quilts. Simply put, you cut it to make a stencil which is then ironed onto fabric in order to print/paint your chosen design. It’s far more common in the US, but here in the UK it can be ordered from many online craft shops. For those unfamiliar with the process I have created a simple and quick tutorial.

What You’ll Need

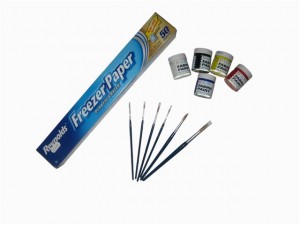
  • Reynolds Freezer Paper
  • Pencil
  • Craft knife or Scissors
  • Fabric Paint
  • Brushes
  • Iron

Step 1

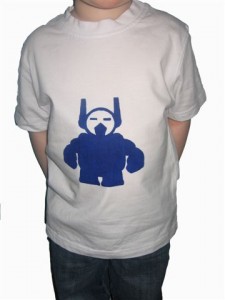
Start by creating your design. Ours is a robot version of Sean Eskimo (affectionately called Sean Eskibot). You can either draw or trace your design onto the freezer paper, or it is possible to cut it and print straight from your computer (print the design onto the matt side of the paper). Cut out using a craft knife or scissors.

Step 2

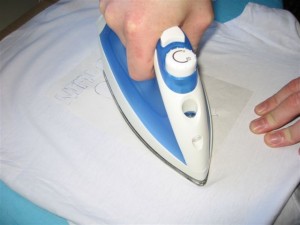
Place your stencil shiny side down onto your tshirt/fabric and iron into place. The Freezer Paper will cling on making it super easy to apply the fabric paint. Using a big brush gently apply the fabric paint onto the stencil. Depending on the brand of paint you may be advised to fix between layers. This is normally achieved by placing a cloth over your stencil and ironing on top (make sure the paint has dried first!).

Step 3

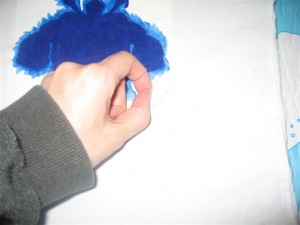
Once you have built up the correct depth of colour let the paint dry and then fix according to the packet instructions. Now the fun part! Slowly start to pull off the Freezer Paper beginning at one corner, your masterpiece is finally being revealed!

Tips

I like to wash the finished designs once before wearing, this returns the fabric to it’s normal softness. It also ensures that the paint has properly adhered, if any comes off just top it up and fix again.

You can create multilayer stencils and build up a design using several layers of colour. Just make sure each layer is dry and fixed before you start the next.
 

Happy Father’s Day!!

Happy Father’s Day everyone!

We had two father’s to cater for here and being a crafty type I decided that homemade was the way to go. As you’ll probably all know from a previous post I’m a bit addicted to applique at the moment. So it seemed logical to put this to good use, but can you really applique things for a man??

I was trying to think what might be a useful present to give and remembered that my husband had complained of needing more tshirts. Thankfully good quality plain cotton t-shirts are not that expensive and are usually available at most shops.

Next I had to tailor my designs to suit the recipients. My Dad has quite a few hobbies but none seemed like the kind of thing I could translate into a t-shirt design. Luckily he also has a great sense of humour and is often to be seen doing silly walks to amuse the children, have you guessed where I’m going with this one yet? One internet search later and I had decided on my design. Here is the finished homage to monty python

Next my husband. He’s a arty type in his own right so making something to impress him might have been harder. Luckily or unluckily depending on how you look at it, he’s been annoying me for weeks by shouting ‘Bazinga!’. If you don’t know the reference he’s a fan of the comedy show ‘The Big Bang Theory’ and this is the catchphrase of one of the stranger characters Sheldon. End result:


Tips for creating your own tshirts

Remember that if you draw your image and then trace it onto bondaweb you will get a mirror image out of your fabric. If (as in the case of letters) they need to be the right way round make sure you trace them in reverse before applying to the fabric.

Next make sure you use a good quality fabric to applique with, t-shirts are not a delicate piece of clothing and yours should be able to stand up to the daily traumas of casual clothing.

Finally sew, sew, and sew it on until you are sure the design will not crumble, fray or generally get destroyed by your washing machine.