 In my last post I showed you a collection of our recently completed Easter Crafts as part of the Bostik craft network. Today I’ll show you how to make an Easter Bumble Bee and Easter Rabbit with our simple and fun tutorial.
You will Need
Polystyrene Egg shapes
Googly Eyes
Bostik Glu Dots
Pens
Ribbon
Pipe Cleaners
Buttons
Pom Poms
Sheets of craft foam
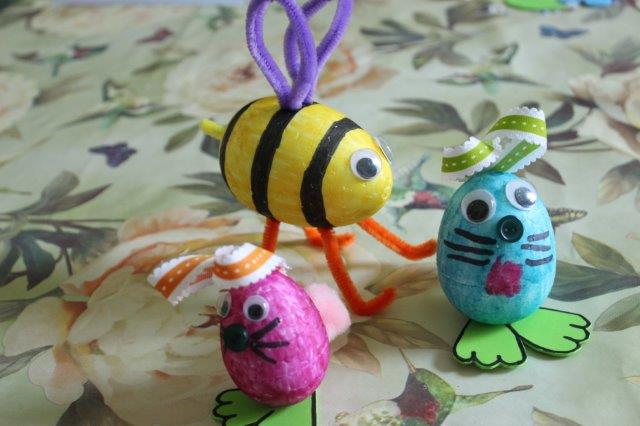
Bumble Bee
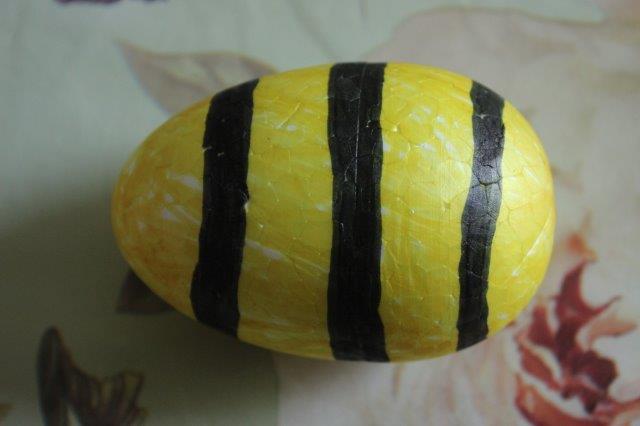
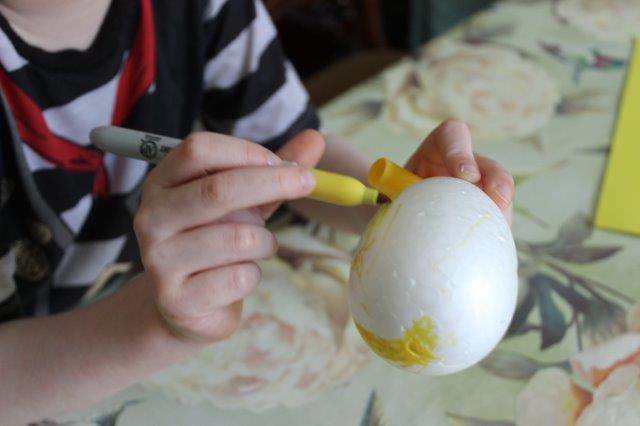 Start by colouring in one of your egg shapes yellow with black stripes.
Next take two pieces of pipe cleaner (a colour of your own choice, we used purple) and bend into wing shapes. 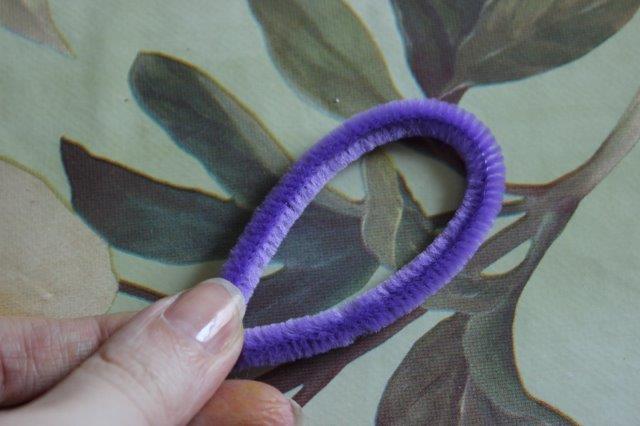
Take another four lengths of yellow or orange pipe cleaner and bend to make legs, obviously if you want a technically correct bee he should have six legs, but four fitted in much more neatly.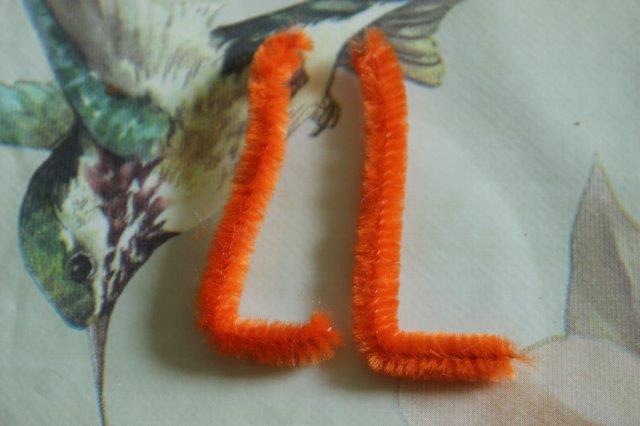
Push the leg pieces into one side of the coloured polystyrene egg shape. Push the wing shapes into the opposite side.
Finally stick some large googly eyes to the front of your bee, and push a small length of yellow pipe cleaner into the end to make his stinger!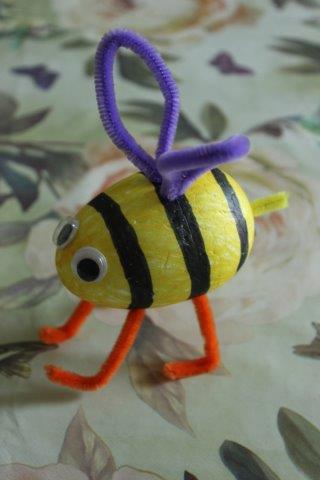
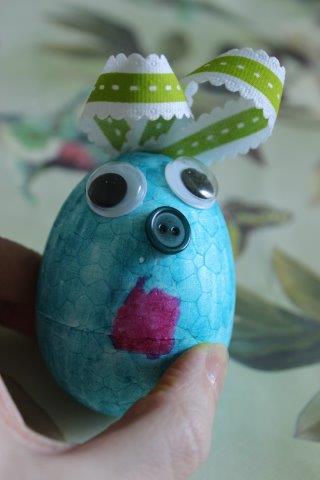
Rabbit
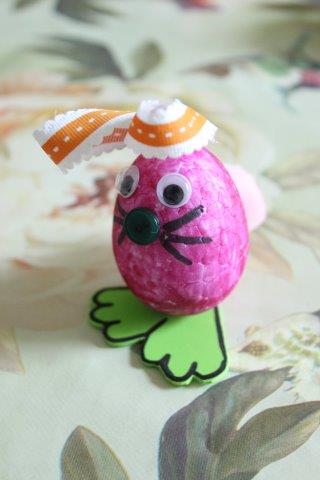
Begin by colouring in a polystyrene egg shape in a colour of your choice.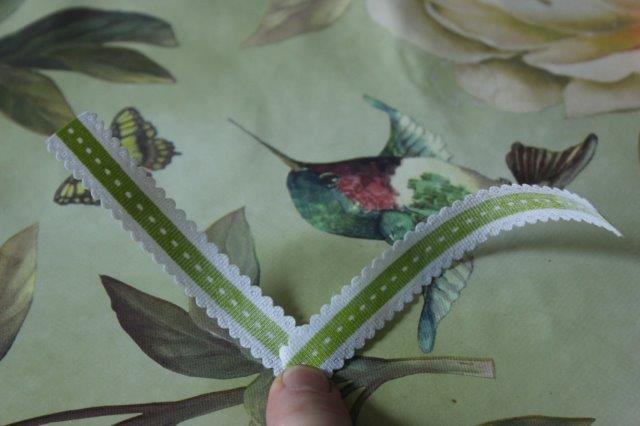
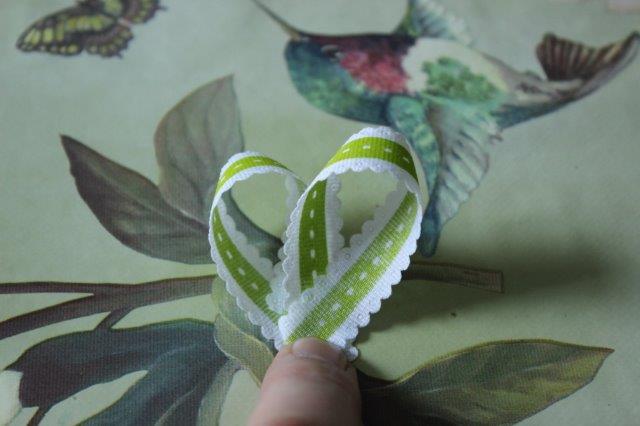
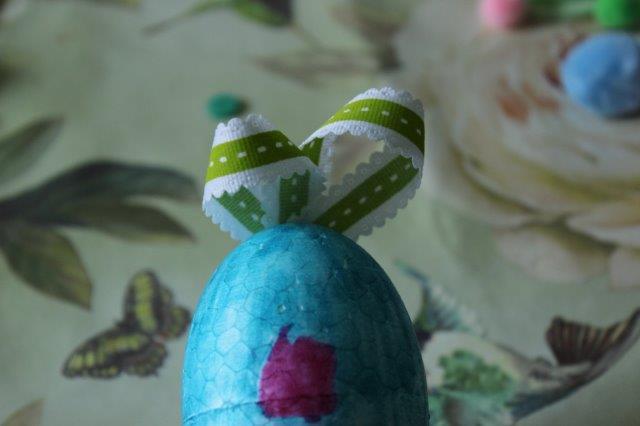
Next take a length of ribbon and fold as shown in these pictures to make the rabbit’s ears. Attach the ribbon ears to the thin end of your egg shape using a Bostik glu dot.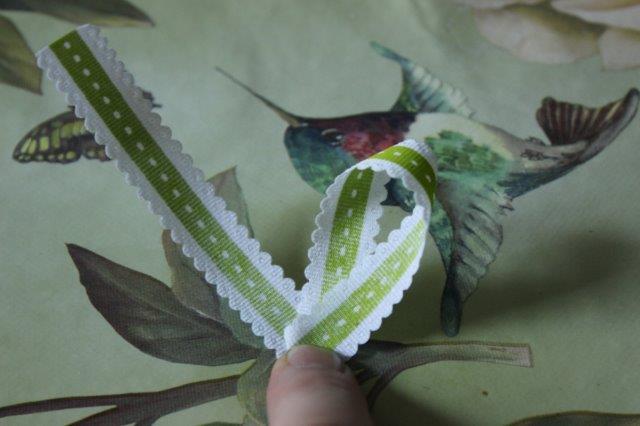
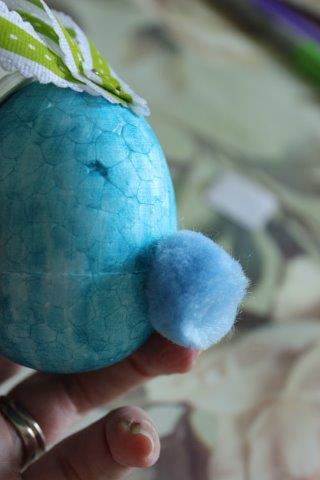
Next stick on two googly eyes to the front. Then using a Bostik glue dot stick a button on to give the rabbit a nose, you can draw the whiskers on using a felt tip pen.
To allow your rabbit to stand up unaided he will need some feet! Cut feet shape from your craft foam and attach to the base of your bunny using a Bostik glu dot.
Finally give your rabbit a lovely cotton tail by attaching a pom pom with a Bostik glu dot to his back.