Valentine Magnet Badge Card Gift Tutorial!

If you hadn’t already guessed by the abundance of red and pink in the shops, (not to mention a copious amount of stuffed bears holding hearts) Valentine’s Day is nearly upon us. Personally I shy away from shop bought offerings, instead preferring to spend a bit of time making a handmade gift or card. It’s also a fabulous way to involve my children in the day. They really enjoy making presents and cards for their friends or each other.

Today’s tutorial is also quite versatile as the hearts can be made into either fridge magnets or badges, both of which can be attached to the front of a handmade card.
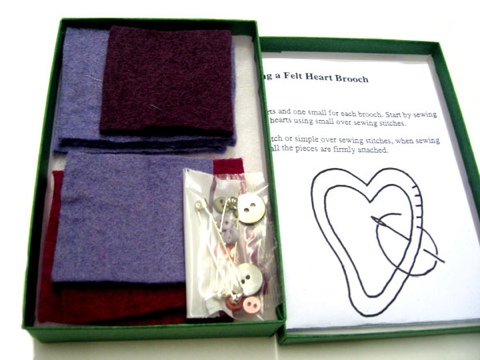
You Will Need

Thin Cardboard

Old Newspapers

PVA glue

Acrylic Paint

Decorative Paper or Fabric

Embellishments – sequins, fabric, buttons etc.

Quick Drying Gloss Varnish

Badge backs or Magnets

Strong All Purpose Glue

Step 1

Start by cutting out small heart shapes from the thin cardboard (old cereal boxes work perfectly). If you want to make sure the hearts are even, fold the cardboard in half then draw half a heart against the fold before unfolding and cutting out. It’s even quicker if you save the first heart and use it as a template to cut out several more.

Step 2

Cut out some small pieces of newspaper (just larger than your heart). Using PVA glue, stick nine layers of newspaper to one side of the heart and leave to dry. Once dry, cut the excess newspaper away to leave the heart shape, then repeat the process on the opposite side. If the heart curls slightly while drying, place it under some books to flatten out. If it has badly curled use a hot dry iron (I put brown paper between the iron and the shape), but be careful not to burn it.

Step 3

Once all the hearts are completely dry, paint both sides with acrylic paint (I used a gold colour).

Next using either decorative paper or fabric cut out a heart just slightly smaller than your original shape. Stick to the front; as it’s slightly smaller you should see a little of the painted edge all the way around.

Step 4

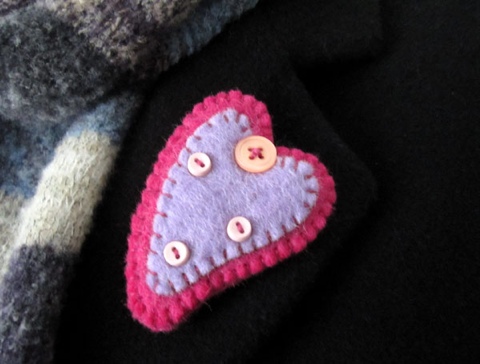
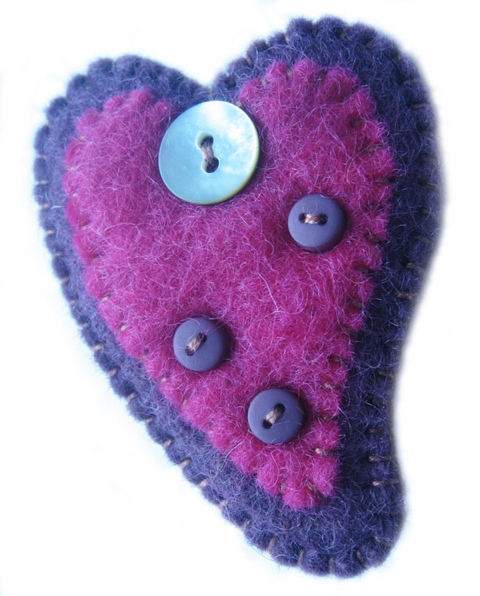
Now comes the fun part, decoration! I used sequins, fabric, buttons and words torn from paper. Stick them to the front of the heart using the all purpose glue. When you are happy with your design and the glue has dried, apply a couple of layers of varnish. Don’t forget to varnish the back of the heart once the front is dry. Finally attach a badge back or magnet to the back of the heart using a strong all purpose glue.

If you want to mount the hearts onto cards they can be attached with small sticky pads or cut a couple of holes to attach the badge back through.

Love must be in the air – Felt heart kit

20120124-132302.jpg

Valentine’s Day is just around the corner and it seems that love is most definitively in the air at the Angel Eden shop.

20120124-132356.jpg

Our various craft kits have always been popular, even gracing the pages of several top craft magazines. Recently though one kit in particular has suddenly become our must have item! It seems that customers have been feeling rather romantic of late and our felt heart kits have been selling like hot cakes!

20120124-132526.jpgAs each kit makes two heart brooches I’d love to know if they are destined to be made into two gifts or whether the kit itself is the present. Of course they could be made into romantic decorations, key rings or anything else you can dream up.

20120124-132632.jpgI have to admit that I’m not a massive fan of valentines 8/ it often feels overly commercial despite being an old celebration day. With this in mind my husband and I have set a new rule that our gifts to one another must be handmade. When you can appreciate the time and energy that goes into a present I think it means so much more. Valentine’s Day is also notoriously expensive, with the price of everything from flowers to meals out skyrocketing.

In honour of this most romantic of occasions and to encourage you all to think handmade, I’m very pleased to be able to offer all our blog readers a special discount code which can be used from now until 14th Feb. Enter the code love at the checkout to receive free shipping on all orders.

Christmas Gift Tag Ideas!

I may be an adult, but I still think there’s something very exciting about rummaging under a Christmas Tree, reading tags and guessing what gifts you might receive. It’s probably a nod to my inner child, but if you can’t get excited at Christmas, then when can you. In these economically challenged times, we may find that our trees are a little smaller and the gifts have shrunk in number. I don’t think that has to mean gift giving becomes diminished though. A little bit more creativity and the way we present a gift can make all the difference to the recipient. So today I’ll sure you some of my favourite ways to make gorgeous homemade gift tags, so you may adorn your presents with pride!

All of the tags are made from simple brown cardboard luggage tags, which are available from any good stationer.

Design No. 1

For the first set of tags I removed the string and cut a little extra from the corners to give a good shape. I then stenciled ‘To’ and ‘From’ onto the back.

Then using some pinking shears I cut up an old map, old Christmas paper and pictures and glued them into place. You could also use pictures from old magazines, old cards, anything really.

Next I added a couple of Christmas shaped sequins, but glitter would have worked just as well. Add a little ribbon to the top and you’re done!

Design No. 2

For the next set I cut out some scraps of old Christmas fabric, but any bright fabric works well. I glued these onto the tags and then sewed on some buttons.

Design No. 3

This one is fairly similar to the previous design. The only difference is the introduction of a hand-sewn Suffolk Puff. These can be made up very quickly and when a button is sewn on top they look fabulous! For instructions on how to make a Suffolk puff see our tutorial here.

Design No. 4

I have a huge stash of leftover ribbon, pieces that were saved from earlier projects, chocolate boxes and so on. For this design I raided my stash and glued small pieces of ribbon and lace onto the tag. I left enough space to stencil on ‘To’.

I think there’s no end to the possibilities when it comes to decorating gift tags, I just hope these few might inspire you a little bit 🙂