Artistic Advent Calendar to be auctioned on eBay for Oxfam

box4This Christmas I’ve joined forces with Parcel Hero and Oxfam to create a truly unique Advent Calendar to be auctioned on eBay.

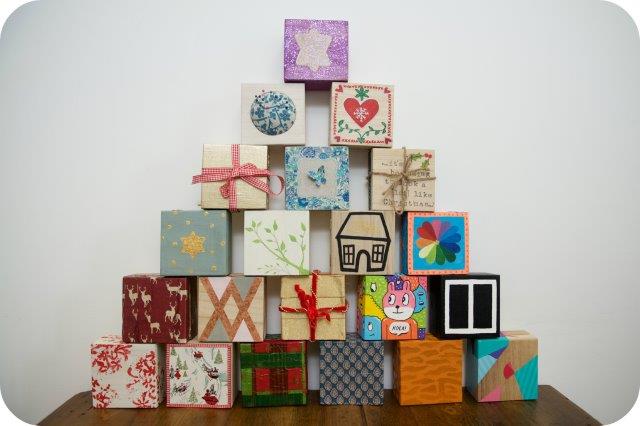
International Courier company Parcel Hero contacted myself and 24 other well-known craftsmen and women to ask if we would donate our time and skills to create an amazing advent calendar which would be auctioned to raise money for Oxfam. It sounded like such a fun and worthy project that I jumped at the opportunity to get involved.

In October Parcel Hero sent out 25 plain wooden boxes to artists across the globe with one simple brief… ‘turn them into something spectacular!’

So what happened to my box…
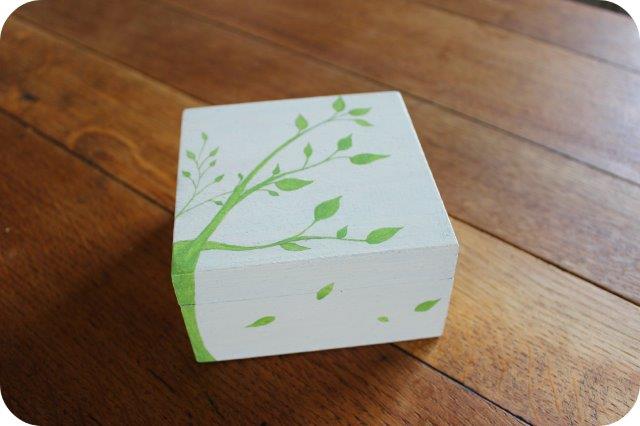
boxThe Outside

The outside was painted using some of my favourite colours and motifs (look at my logo to see what I mean). I think twisted leaves set on a cream background is such a restful image and I wanted to share that with the lucky recipient. The painting was then waxed.

The Inside

In complete colour contrast (I like to keep people guessing) I painted the inside with deep colours to look like a simple silhouetted street. Dark skies and lights in windows all conjure up images of the season and I loved how deep and soporific an image they create.box2

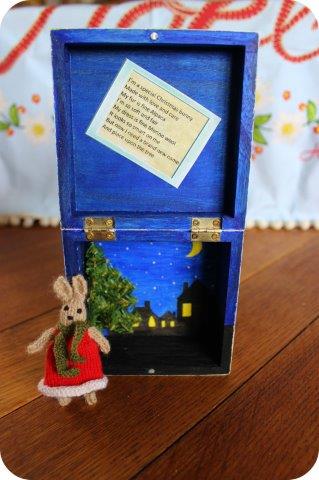
I also wanted to add a 3d element to the scene so created a Fir Tree made from pipe cleaners.

The Poem

In the lid I wrote a poem to explain the gift inside:

‘I’m a special Christmas bunny

Made with love and care

My fur is fine Alpaca

I’m so soft and fair

My dress is fine Merino wool

It looks so smart on me

But now I need a brand new name

And place upon the tree’
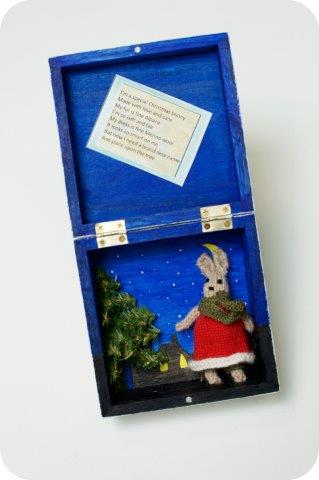
box5The Gift

The poem may have given you a clue. The gift was a small (and I mean teeny) rabbit I knitted who can be hung upon the Christmas tree. She was made from the finest Alpaca wool (it’s so soft!) then clothed in a hand-knitted Merino wool dress complete with bloomers and a scarf. I hope she will be loved by her new family and grace the tree for many years.box3

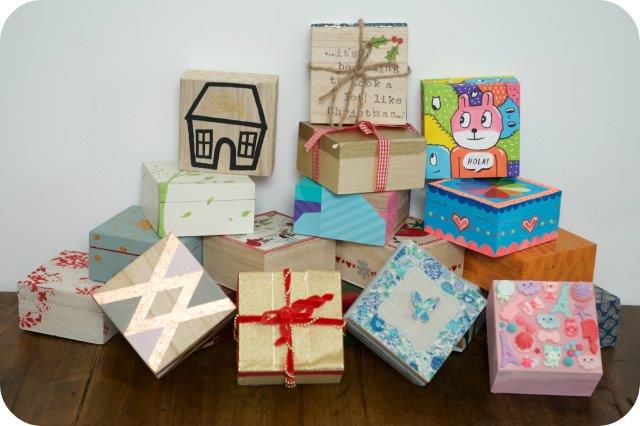
Of course this box was just my contribution and with 24 more boxes from the likes of Matt Jones of Lunartik, Jenny Barnett Rohrs of Craft Test Dummies, Hilary Pullen of UK Craft Blog and Pablo Lentile there’s definitely something to delight everyone!

Oxfam’s partnerships manager Peter Hall commented: “Oxfam gives a massive thankyou to every artist who has taken part. These advent boxes will help change lives. We are so impressed with the amount of effort and creativity that has gone into these creations. Let’s hope they raise loads of funds to help Oxfam end poverty sooner! Happy bidding!”

Parcel Hero’s head of PR David Jinks, added: “This is probably the most unique and inspired advent calendar ever created; but sadly only one person can own it.”

If by now you’re wondering just how you can get your hands on this wondrous creation, then head on over to eBay here and bid bid bid. The auction closes on 26th November and all money raised will go directly to Oxfam.


Advent Calendar Sewing Tutorial

With the festive season fast approaching I decided to share my tutorial to sew your very own advent calendar! I originally wrote this for the Boden Community which has now become the Boden Blog. You might just be able to find it if you scour through the archives, but it seemed far simpler to share it direct with my readers over here.

You Will Need

A hanger (I chose a lovely old wooden one)

2 pieces of fabric to make the background (mine measured 34cm X 48cm but this may vary depending on the size of your hanger)

1 piece of fleece fabric 34cm X 48cm

4 pieces of ribbon approximately 28cm in length

35cm piece of ric rac or ribbon

5 pieces of fabric measuring 12cm X 36cm each

24 mini luggage labels

24 mini gold safety pins

24 Sweets of your choosing.

Step 1

Begin by pinning the two background pieces of fabric together (right sides facing). Then place on top of the fleece fabric (I used an old blanket to cut the fleece from). Sew down one long side, across the bottom and back up the other side, leaving the top free. Iron the pieces together and then trim the fleece back close to your stitches, also trim the corners to aid turning.

Step 2

Turn the fabric the right way out and iron flat again, tuck in approximately 1cm of fabric at the open edge and iron ready for sewing. I chose to hang the calendar using pretty ribbon. Fold the 4 pieces of ribbon in half and tuck into the top open edge of your calendar. Sew across the open edge of the calendar, making sure to catch the ribbon as you go. For a little extra decoration I laid a piece of matching ric rac across my stitches at the top and sewed into place (ribbon would also work). You’ve now completed the background piece.

Step 3

Time to make the pockets! On each piece of fabric turn over 1cm of fabric along one of the longer sides. Iron and then turn another cm over and iron again, this is the top edge of each set of pockets. Now turn each remaining edge over 1cm and iron. Machine stitch just the top edges of the pockets, leaving the other edges free.

Step 4

Position each set of pockets evenly across the background fabric and pin. Machine stitch across the bottom of each pocket and then around the entire edge of the calendar. You will now have 5 large pockets. In my example the first 4 rows have 5 pockets and the final row has 4 larger pockets. To create this you need to machine across each large pocket several times to make smaller pockets. On the first four rows I did this at approximately 6 ½cm intervals. On the final row I sewed at approximately 8cm intervals.

Step 5

To make the calendar numbers I bought some small luggage labels from a Stationary shop. I cut them down just slightly to make them smaller. Using a red and green crayon I then stencilled a number onto each label. These are then pinned to each pocket on the calendar using mini gold safety pins (again picked up from a Stationary shop).

Step 6

Decide who the calendar is for and fill each pocket with an appropriate sweet or gift. It could even serve two or three lucky recipients, just pop a couple of extra sweets in each pocket. Now you have an attractive and reusable advent calendar that should serve you for many years to come.