Howl’s Moving Castle Steampunk inspired Bento lunchbox!

Steampunk Bento Box #shop

Steampunk Bento Box

I am a member of the Collective Bias®  Social Fabric® Community.  This shop has been compensated as part of a social shopper insights study for Collective Bias and their client.

I absolutely love the Japanese art of Kyaraben Bento boxes. A Bento box is basically a Japanese lunchbox containing a single meal. A Kyaraben is a character bento box where a chef or enthusiast has prepared the food to look like popular characters. They can be extremely elaborate and there are many tools available to help in their preparation (such as cutters or egg shapers).

While I have admired them from afar I have never attempted to make one, partially because I know nothing much about Japanese cuisine or cookery and partly because they just look too difficult! However I finally decided to take on the challenge, while adding my own spin (this isn’t an authentic or traditional Bento, just my take on it).

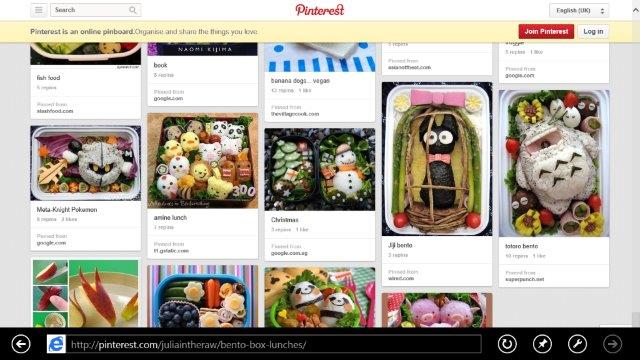
Pinterest Bento Boxes #shop

Pinterest Bento Boxes

My favourite place to visit for inspiration is Pinterest and this page in particular has some awe inspiring designs. I’m a huge Studio Ghibli fan (if you do not know their movies you’re missing out!) and I immediately gravitated towards the Totoro designed Bento.

Anna The Red #shop

Anna The Red

This was designed and created by Bento blogger Anna the Red. Aside from a whole collection of Bento images, she also includes several brilliant tutorials if you’d like to give this art form a try.

With my research done I headed down to Sainsbury’s to do my shopping, you can see how I got on and failed (there was no sushi rice!) here.

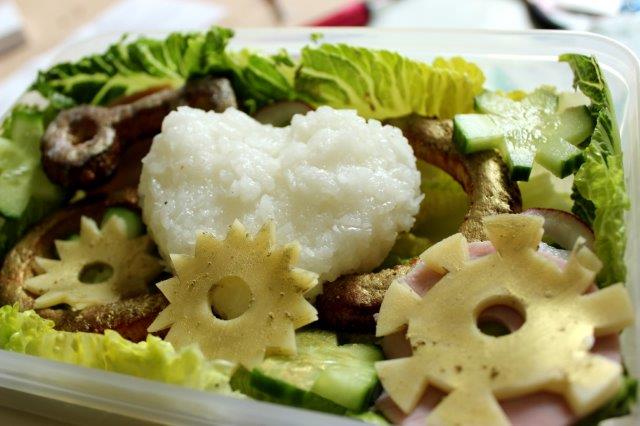
I didn’t want to copy any of the Bento boxes I’d seen, because they weren’t my designs. Despite my lack of experience I assumed I’d be alright trying out my own idea; I’m not overly convinced this turned out to be true but I’ll let you judge that later. I wanted to make a Bento inspired by another Studio Ghibli film ‘Howl’s Moving Castle’. The story has quite a steampunk design throughout, so rather than make an individual character I decided to make a Steampunk Bento box. I wanted to make a mechanical heart complete with cogs, pipes and wheels.

Edible key and pipework #shop

Edible key and pipework

Edible pipework

I couldn’t work out how to make pipework in a Japanese style, so instead I made Cheese Straws! Obviously this is not authentic Bento but they worked. I rolled them out as you would normal cheese straws but instead of cutting and twisting I used a knife to cut out ‘C’ shapes to make my pipes. Once cooled I used a little edible Gold lustre to make them more metallic in appearance. I also made a key shape out of the cheese straw mixture.

Edible Cogs and wheels #shop

Edible Cogs and wheels

Cogs & Wheels

For my cogs and wheels I cut out Leerdammer cheese, radishes, ham and cucumbers. I thought they looked quite sweet 🙂

Rice Heart #shop

Rice Heart

Heart

The heart was made from cooked and cooled rice, moulded by hand in cling film. I sort of wish I’d added some colouring to the rice but I didn’t think of this until afterwards.

Steampunk Bento Box #shop

Steampunk Bento Box

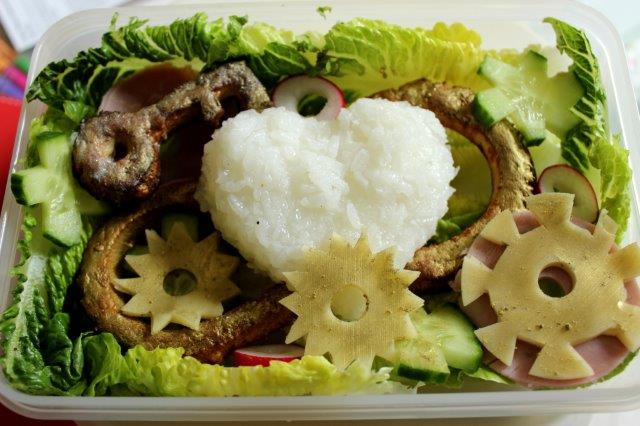
The Finished Bento

I lined my box with lettuce before assembling the various parts. As a creative person with a somewhat perfectionist personality, it’s always my intention to strive to improve and I can’t wait to give Kyaraben another try soon! For a first attempt I don’t think I did too badly.

Steampunk Bento Box #shop

Steampunk Bento Box

Pinterest Inspired Simple Camera Bag and Kids Backpack Tutorials!

SLR Camera Bag

I am a member of the Collective Bias® Social Fabric® Community. This shop has been compensated as part of a social shopper insights study for Collective Bias and their client.

For a long time I have salivated over the cameras of others, looking down on my humble compact and feeling somewhat inferior. I dearly love photography, even possessing a photography qualification but since the introduction of digital cameras, an SLR has alluded me. So when I write that I am now the proud owner of a beautiful Canon DSLR you will understand my paranoid need to protect it. However my own personal sense of style demands that I don’t just buy any old camera bag, I wanted something that suits me and my lifestyle.
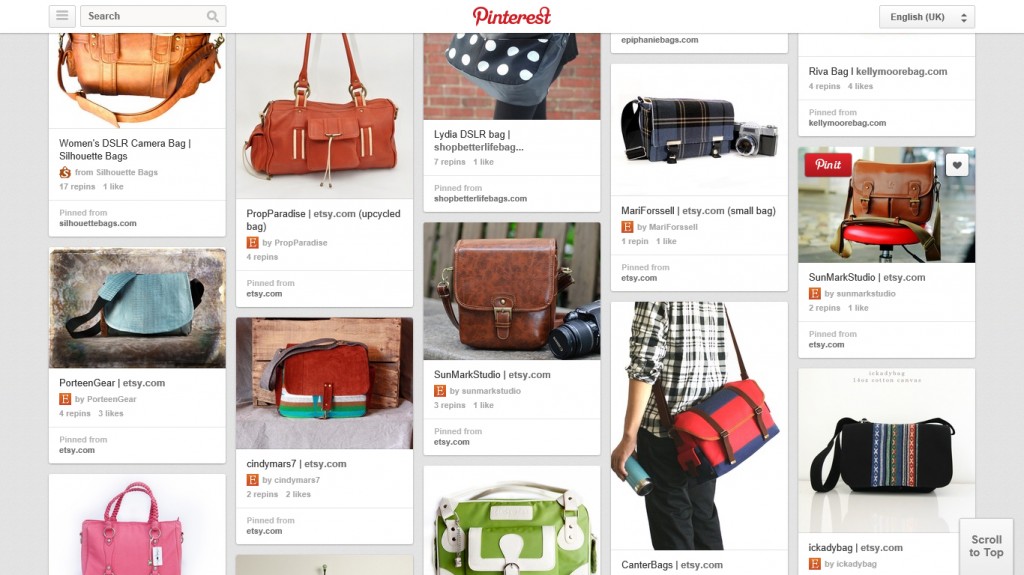
Pinterest Camera Bags #shop

Pinterest Camera Bags

I began to research into camera bags and cases, but I found none that I liked 🙁 With a family trip looming I turned to Pinterest for inspiration and created my own camera bag based around some of the bags that I viewed. Some of these were available to buy from stores and some had been handmade.
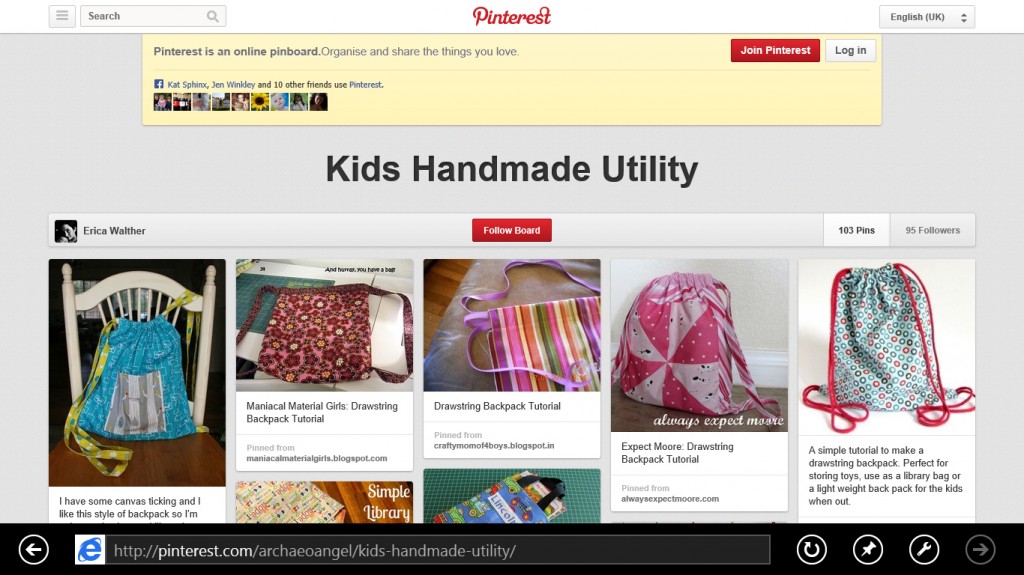
Pinterest Backpacks #shop

Pinterest Backpacks

I also wanted to make my kids some simple backpacks to hold a few bits and bobs to keep them occupied during our trip, again I found a great deal of inspiration on Pinterest. I shopped for the majority of my supplies at Wilkinsons and you can see my shopping trip by clicking here.

Kids Backpacks #shop

Kids Backpacks

I’m rather proud of my finished bags 🙂 The camera bag could perhaps benefit from some extra pockets or internal dividers but for my own personal needs it works brilliantly. The kids bags are comfortable and practical and they love them. If you would like to make your own version of either of my bags the instructions are below 🙂

SLR Camera Bag

Simple Camera Bag Tutorial

Supplies:

2 pieces of liner fabric 36cm (w) X 30cm(h) with 9cm squares cut out of bottom of width

2 pieces of outer fabric 36cm(w) X 30cm(h) with 9cm squares cut out of bottom of width

2 pieces of pvc fabric 36cm(w) X 30cm(h) with 9cm squares cut out of bottom of width

1 piece of foam 18cm X 16.5cm

2 pieces of foam 18cm X 18cm

2 pieces of foam 15cm X 18cm

2 pieces of 10cm square of outer fabric

2 D-rings

1 piece fabric 36cm X 19cm for flap

1 piece pvc fabric 36cm X 19cm for flap

1 piece Lining Fabric 36cm X 19cm for flap

1 piece of fusible Interfacing 36cm X 19cm for flap

2 buckles or clasps

Straping/webbing for bag strap

Velcro

Step 1 #shop

Step 1

1. Begin by pinning the pvc fabric to the outside fabric pieces on the wrong side of the outer fabric. Zigzag around each piece to attach the pvc to the outer fabric.

2. Pin the two outer fabric pieces right side together. Sew across the bottom and down the sides, but do not sew any part of the square shape, we are creating a T seam. I used a 3/8” seam allowance. Repeat step with lining fabric. You should now have two open box shapes.

3. Squash the (cut out) square shape flat, lining up seams and then sew across to create a T seam, do this on the outer and liner fabric pieces.

Step 3 #shop

Step 3

4. Take the foam piece 18cm X 16.5cm and stitch by hand to the bottom of the liner fabric on the wrong side (against raw seams). Do not attach the side pieces of foam, we’ll slot them in later.

5. Take one of the 10cm squares of outer fabric, zigzag around the entire square. Iron over approximately 1cm on each side of the square, then iron in half length ways.

6. Sew along the edge to close, then pass through the D-ring and sew to the side seams of the outer fabric box to make loops for the bag strap.

7. Take the flap outer fabric & PVC fabric and attach them together by zig zagging around the edge. Iron the fusible interfacing onto the lining flap piece.

8. Pin the outer fabric flap piece to the flap lining piece right sides together and sew around three edges, turn the flap out the right way. Press and then edge stitch around three edges of the flap, still leaving the back edge free.

9. Sew half of the buckles to the bottom edge of the flap. Sew the other side of the buckles to the right side of the outer fabric (you may need to pin your flap in place temporarily to find the correct position).

Step 9 #shop

Step 9

10. Turn the outer fabric inside out, sew the flap to the outer fabric (right sides together).

11. Place the liner fabric box inside the outer fabric box (right sides together, so bag looks inside out), line up the seams and sew across the sides and flap seam, leave the other seam free. Turn the bag the right way out through the open seam. Wiggle the foam side pieces into position and then push the liner back in on top of them. Hand stitch the open seam closed.

Step 11 #shop

Step 11

12. Next to create the completed box shape we need to secure the flap and stop the sides gaping by sewing Velcro to the sides of the box bag at the top and to the corresponding side edges of the flap.

Step 12 #shop

Step 12

13. Finally pass the straping through the d-rings and stitch to attach. To be really secure I like to sew a square shape with an X shape inside.

That’s it done!

Child's Backpack #shop

Child's Backpack

Childrens Backpack Bag Tutorial

I loved the design of the bags I had seen on Pinterest, however as I wanted the bags to be worn on a day out I wanted them to be really strong, so I decided to line them internally to add extra strength. Here are the instructions for my version of a drawstring backpack.

Supplies:

2 pieces of outer fabric 38cm X 33cm

2 pieces of lining fabric 38cm X 33cm

2 pieces of outer fabric 8cm X 4cm (to make loops for the cord to pass through)

Cord or String

1. Make the loops first by folding the small pieces of outer fabric lengthways and iron. Open out and fold each side to the middle and then fold in half again so you end up with something that is 8cm by 1 cm. Sew along the open edge and iron.

2. For the bag sew the lining to the outside fabric along one of the shorter edges having placed the two pieces of fabric right sides together. I used a small seam allowance which was the width of my machine foot.

3. I then neatened these seams with a zig zag stitch and then folded both pieces to one side, ironed and then machined very close to the edge to keep it flat and to make sure it would not get in the way once the cord was added.

4. Having joined the outsides and linings I placed the two pieces of the bag one on top of the other to sew the side seams. Firstly you must position the loops near the bottom of the outside fabric. I placed mine about 3cm from the edge that will become the bottom of the bag.

5. The joined part of the loop will be facing the centre with the two open ends hanging about 1cm outside the edge of the fabric. Pin or tack these in place and they will be secured when you machine the edges together.

6. The outside pieces will be one on top of each other right sides together and the same with the lining pieces.

7. To sew round the bag start with one of the lining sides and sew together about 1cm in and sew up the side until you are 1.5cm from the fabric join. stop sewing and start again 1.5cm along the side of the right side fabric. You have then a gap in the machining of 3cm.

8. Now continue sewing down the side of the outside fabric over the loop (to strengthen this I went backwards and forwards a few times), across the bottom edge and up the next side again leaving the gap of 3cm. Do not sew across the bottom of the lining.

9. Iron all the seams open and then neaten with a zig zag stitch. Where the gaps were sew these pieces back with a straight sewing stitch to stop these pieces getting in the way once the cord is put through.. Also iron a 1cm turn up on the piece of lining fabric which will make it easier to sew once turned the right way out. Now turn the bag the right way out. Machine the lining closed about 3mm from the edge and then push down inside the bag. To make the tunnel for the cord sew around the bag 1.5cm from the edge where you will have made the gap at the sides and again to strengthen machine back and forwards a few times at the opening in the sides.

10. Now thread some suitable cord though the bag. If using one long piece this should be about 182cm long. You can also make these bags using two pieces of cord, which is easier to close but perhaps less suitable for a child as they could potentially pull the bag closed accidentally (over their head etc).

Child's Backpack #shop
Child's Backpack
Delicious Chocolate Summer Treats with Cadbury’s

I am a member of the Collective Bias® Social Fabric® Community. This shop has been compensated as part of a social shopper insights study for Collective Bias and their client.

Chocolate Party

Chocolate Party

I have gone unabashedly Chocolate mad this weekend, this is a semi natural state as far as I am concerned. I love everything from White Chocolate to Dark, Forestero beans to Criollo, basically I like to eat it and eat it often. Not all my Chocolate is eaten in bar form, I think it’s great to get creative and try out new ideas when you can. When I saw the Cadbury’s shop from Collective Bias I jumped at the chance to join in.

Cadbury's Chocolate

Cadbury's Chocolate

I shopped for my supplies at Asda, where I was mesmerised by the sheer selection. There were huge varieties of Chocolate cakes, Chocolate desserts, Chocolate bars and all of it Cadbury’s. I stuck to my list (almost) and came away managing not to eat any prematurely. To see my shopping trip take a look here.

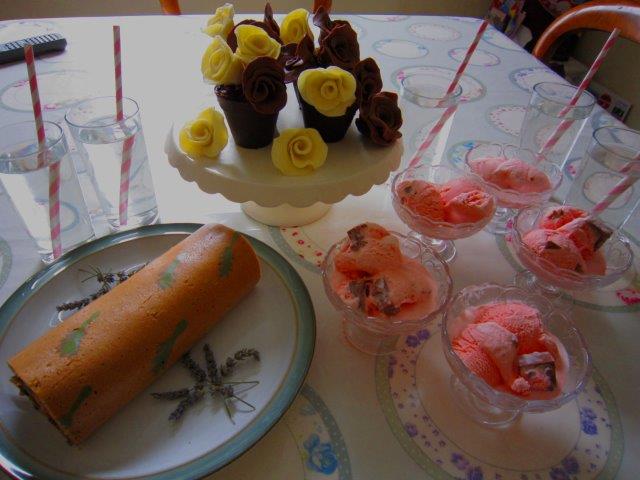
I had so many ideas (inventions) for this post that I couldn’t decide on one single Chocolate creation, so I made three and planned a little Chocolate party for our family. If my husband and I were excited, the children were ecstatic! From the sophisticated and sublime to the downright silly, I had a go at creating it all!

Lavender Chocolate Deco Roll

Lavender Chocolate Deco Roll

Lavender Chocolate Deco Roll

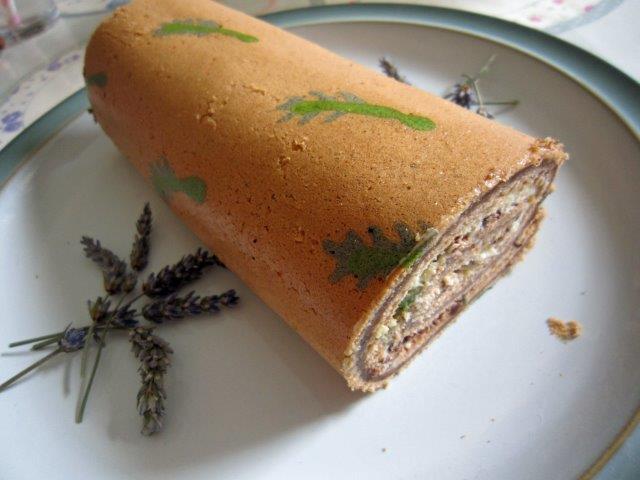
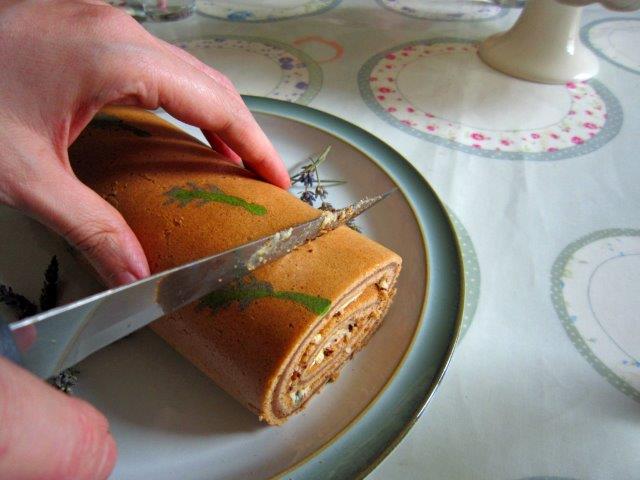
First up was my sophisticated creation the ‘Lavender Chocolate Deco Roll’. I adore Lavender cake and I’ve always wanted to make a Deco Roll so it made sense to try and combine both ideas, thankfully it worked!

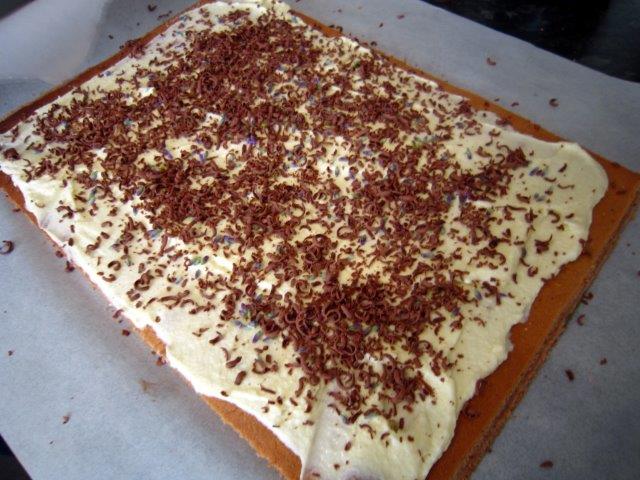
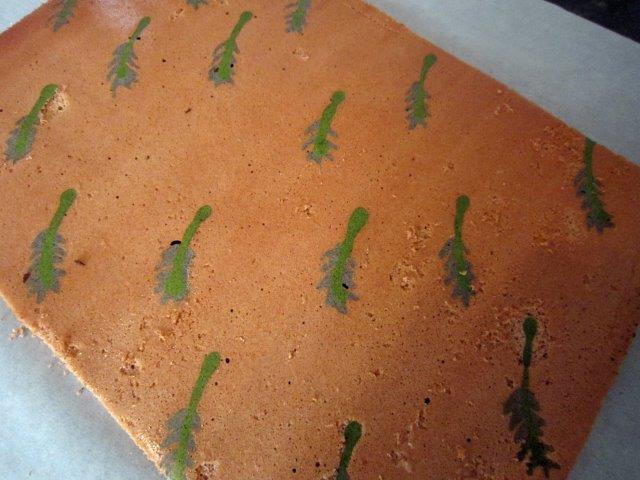
If you’ve never seen a Deco Roll before, they are Swiss rolls with pictures piped right into the cake. Take a look around the web to see some truly astounding creations. I believe they are Japanese in origin and add a level of creativity and whimsy that is otherwise severely lacking from your standard Swiss roll. You’ll probably see that many of the recipes are in Japanese, which causes a slight problem unless your happen to speak that language. I managed to find a brilliant tutorial/recipe on YouTube. Basically you make an egg yolk batter which is coloured and then piped onto a silicone baking sheet in your chosen design (I drew Lavender sprigs). This is baked for just 1.5mins, before making the cake batter which is spread over the top. The end result…wonderfully decorative Swiss rolls.

Flat Deco Roll

Flat Cooked Deco Roll (with Lavender sprigs design)

Deco Roll Filling

Deco Roll Filling

For my variation, the Cake Batter had some cocoa added. Then I cut some fresh lavender from the garden and sprinkled it over whipped cream with sugar for the filling. Next I added grated Cadbury’s Bournville before rolling up. The Deco Roll needs to be in the fridge for at least a day to firm up. I know I made this and I don’t want to sound big headed, but this cake rocked!Deco Swiss Roll

Strawberries and Cream Lego Ice Cream

Strawberries and Cream Lego Ice Cream

Strawberries & Cream Lego Ice-Cream

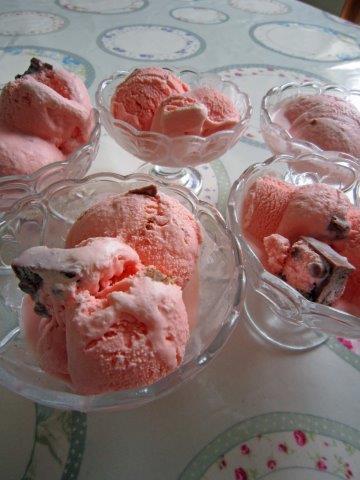
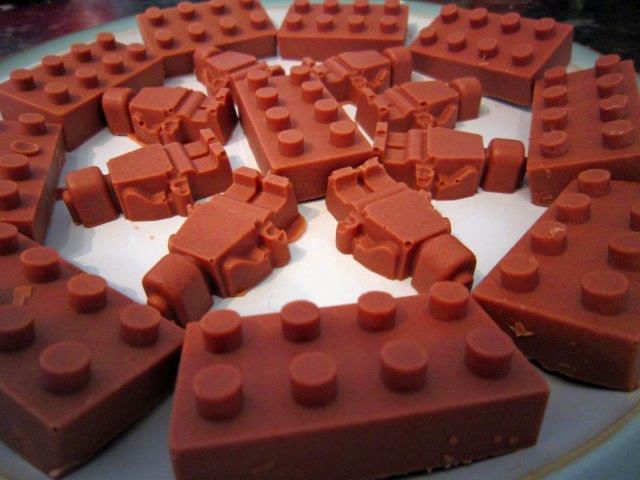
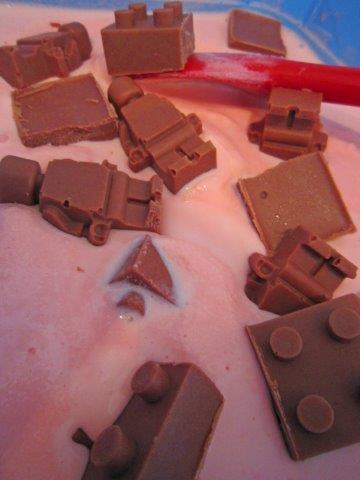
I’m a bit silly when it comes to ice cream, I’ll try chucking anything in there! With that in mind I set about creating my latest idea, Strawberries and Cream Lego Ice Cream. I melted down the brand new Limited Edition Cadbury’s Strawberries and Cream Chocolate and poured into moulds. This smelled absolutely divine, never mind the taste (which was wonderful), it also set brilliantly. These would look great on a cake if you don’t fancy making ice cream 🙂

Chocolate Lego

Chocolate Lego

I used my trusty ice cream maker, of course it can be made without one but it takes more time. Then I placed the Lego blocks and Lego men into the ice cream and mixed before placing into the freezer for a couple of hours. This is the funniest and tastiest summer ice cream I’ve made, the kids routed through and squealed everytime they found a man or brick, great fun for a summer afternoon.Lego Ice Cream

Chocolate Roses in Chocolate Pots with Chocolate Soil

Chocolate Roses in Chocolate Pots with Chocolate Soil

Chocolate Roses in Chocolate Flowerpots with Chocolate Soil

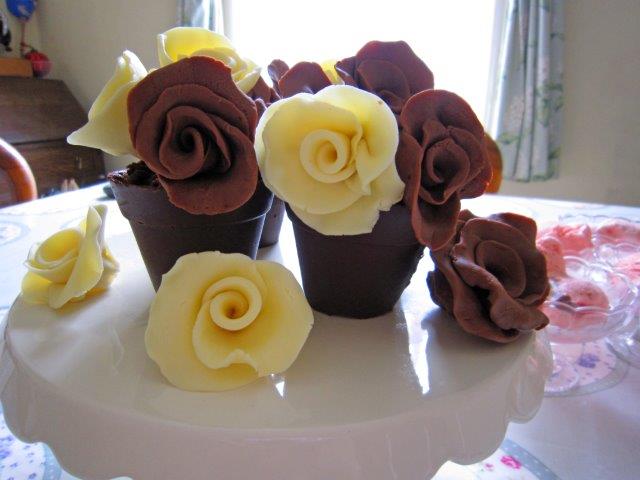
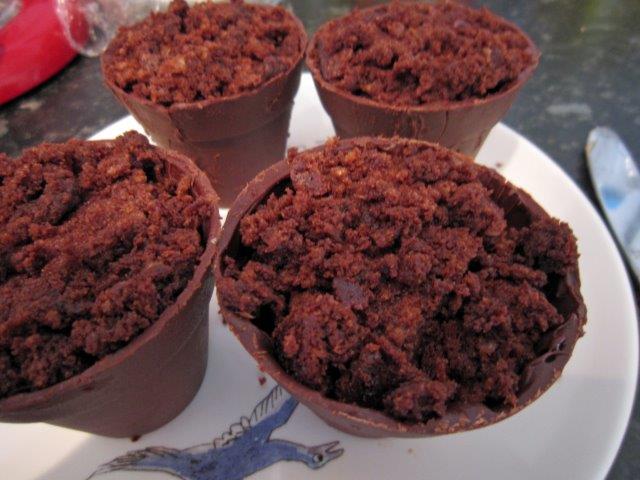
Finally I had another new idea, Chocolate Roses in pots 🙂 I am so chuffed with how these turned out. New ideas are always nerve wracking, so I was over the moon with the end result. First I painted the inside of some silicone pots with melted Cadbury’s Bournville. I built up several layers to give the pots a good thickness before leaving to set.

Chocolate Soil

Chocolate Soil

While these were drying I made a quick batch of Brownies (using Bournville Cocoa of course). I filled the set choc flower pots with the brownies, making sure to crumble some up on the top so it resembled soil. Mmmmmm….. tasty, tasty soil!

Then I made a batch of Dairy Milk Modelling Chocolate. Modelling chocolate is really fun to work with and fairly easy to make (but expensive to buy). Essentially you are adding something like liquid glucose or golden syrup to melted chocolate, I found this easy to follow tutorial on a site called Cakes Decor. Once mixed and cool you end up with a pliable chocolate that bends to your whim, although it can melt and set quickly so don’t make too much at once.

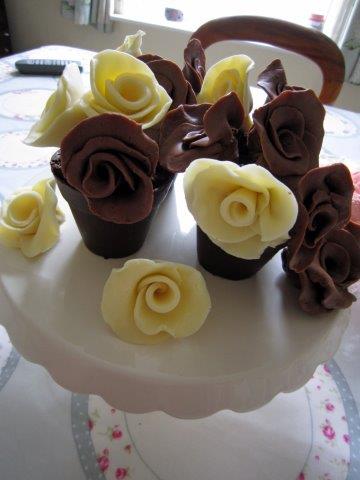
I made mine into Chocolate Roses. They are deceptively easy to make, cut several thin circles of modelling chocolate, roll one up tightly to make the rose centre. Thin the edges of your remaining circles and layer them around the sides. Pinch off any excess at the back and then push some wire in for your stem. I left them to set and then placed them into the chocolate flower pots.

Chocolate Roses

Chocolate Roses

As you might imagine we all had an amazing time sampling these Chocolate creations, I think I might have to make Chocolate Parties a regular event! When else could you eat a flower pot, rose or Lego man without a trip to the local hospital!