 At this time of year many of us find our diaries full to bursting with social occasions. Whether that means large scale parties or small family gatherings, it’s a wonderful opportunity to get creative and make Christmas favours to give any guest that comes your way.
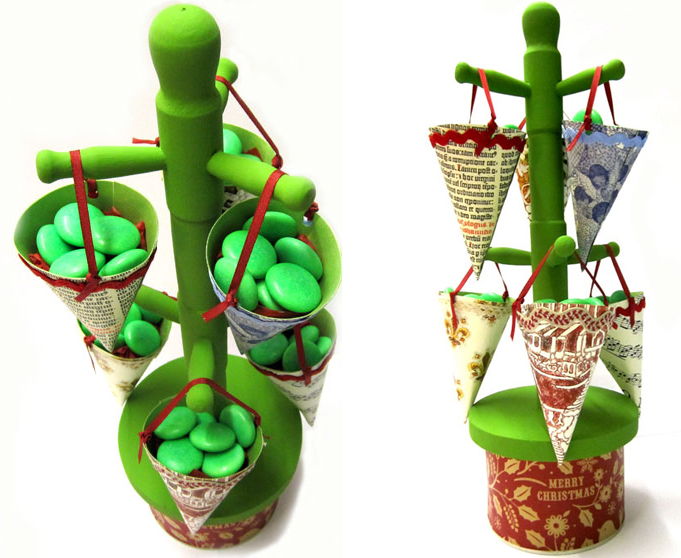
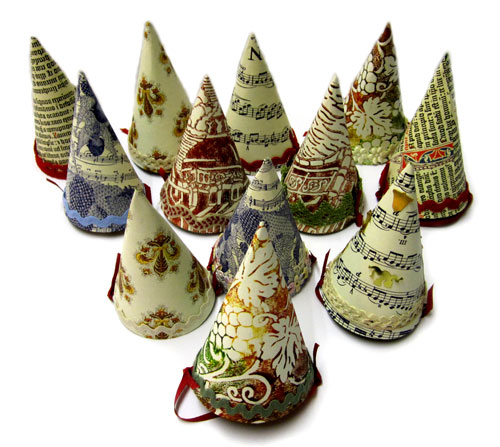
As a family we make Festive Favours to place in the centre of the table. Cute little cones that are incredibly quick to make and can be filled with anything you like. I fill mine with after dinner mints, but they’d look just as good filled with sugared almonds or chocolate coins. They’re also simple enough that children can make them and have huge versatility when it comes to design. The only limit is your imagination!
You Will Need:
Card to make the cones
Paper, ribbon, lace and/or ric rac to decorate the cones
Narrow ribbon or string
PVA glue
Tissue paper
Sweets

Step 1
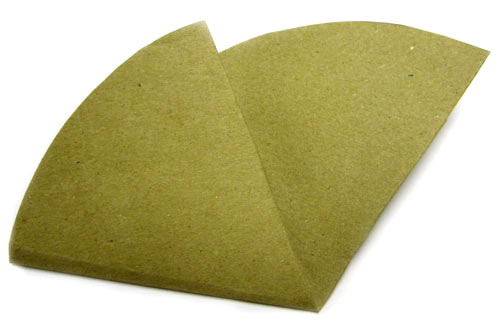
First you need to make a template for the cones. I did this by drawing around a medium sized plate onto packing paper. The template needs to be 1/3 of the total circle, the easiest way to find this is by folding the circle in half and then each half into 3. This will divide the circle into 6 sections and you want to cut out 2 of these sections which equal 1/3 of the circle.
Step 2
Using the new template as a guide, cut out several flat cones from coloured card. I used green card but any colour would work just as well. I managed to cut 3 cones out of an A4 piece of card.
Step 3
Now comes the fun part, decoration! Mine are decorated with handmade paper bought in Venice, but wrapping paper, magazine cut-outs or collages all work beautifully. If your children are helping how about getting them to decorate some paper with festive images or stamps.
Spread a layer of glue over your flat card cones and stick to the paper of your choice. Once dry, cut the shape out again.

Step 4
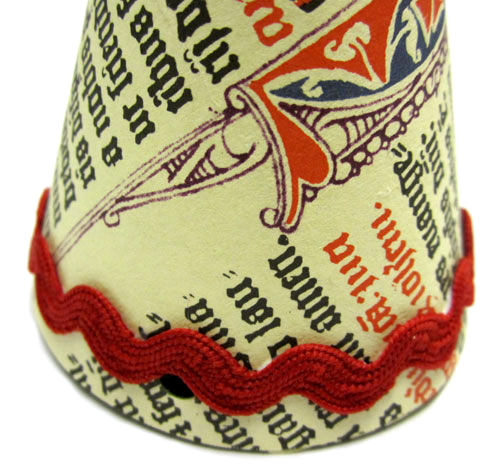
Take each decorated shape and roll into a cone. The two flat sides should overlap slightly and can be glued or taped together.
Next make a small hole in either side of the cone, this is to attach a ribbon for hanging later. I used a single hole punch, but any sharp object should work..

Step 5
Finally add some finishing touches to the cones, I used lace, ric rac and sequins. Glitter glue looks fabulous, but anything will work.
Then thread a piece of ribbon through the holes on each cone and tie ready for hanging. Place a little tissue paper into the base of each cone to act as a cushion. Fill up with your chosen sweets and they’re ready to go.
I like hanging the cones from a mug tree. I bought this from a local charity shop and painted it green. Then I decorated a tin can with Christmas paper and stuck the mug tree on top. You can even glue Christmas decorations onto the tin, making it into a lovely table centre. Of course you could hang them from anything you can think of. I add more cones as necessary while my guests take their yummy favours home.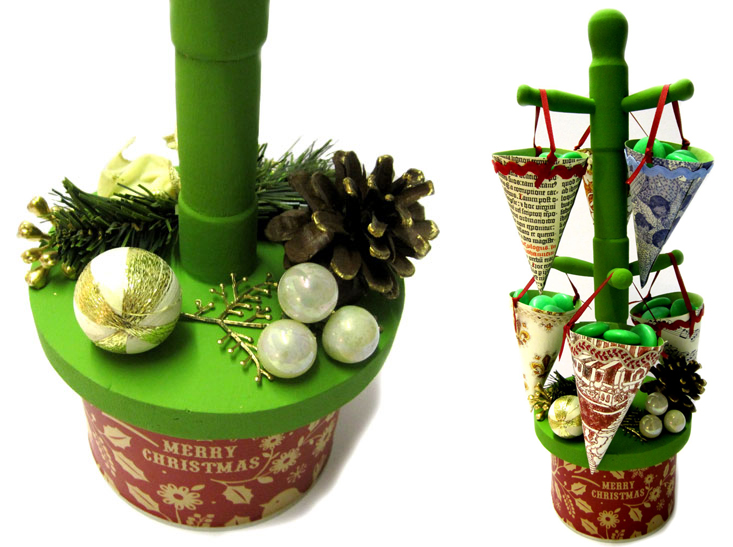
I originally wrote this tutorial for the Boden Community which has now become the Boden Blog. You can find it if you look through the archives but it’s much quicker to share it direct with my readers over here. 🙂
