Autumn and Halloween crafts with Bostik!

The nights are closing in and cold air is sweeping through our homes, Autumn is definitely here! There’s no need to be downcast though, less time out playing means more time indoors crafting for all members of the family. Today I’m showing you some fun Autumn and Halloween crafts that your kids are bound to enjoy. As part of the Bostik Craft Bloggers Network I receive a regular box of themed goodies that let my kids and I enjoy a great afternoon coming up with interesting ideas that are fun to make.

DSC_0209
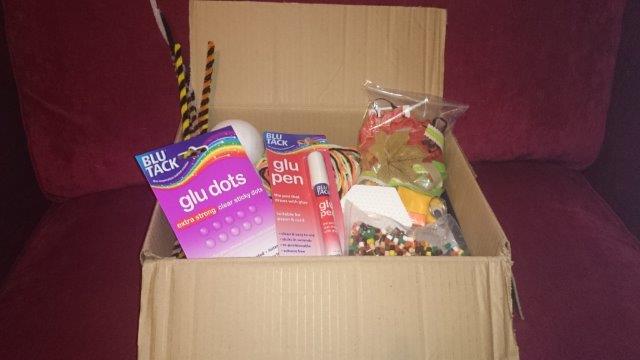
This month our box contained:

Pegs

Lolly Sticks

Pipe Cleaners

Faux Leaves

Bostik Glu Dots

Bostik Glu Pen

Ribbon

Polystyrene Balls

Melting Beads

Greaseproof Paper

Here’s what that lovely box turned into:
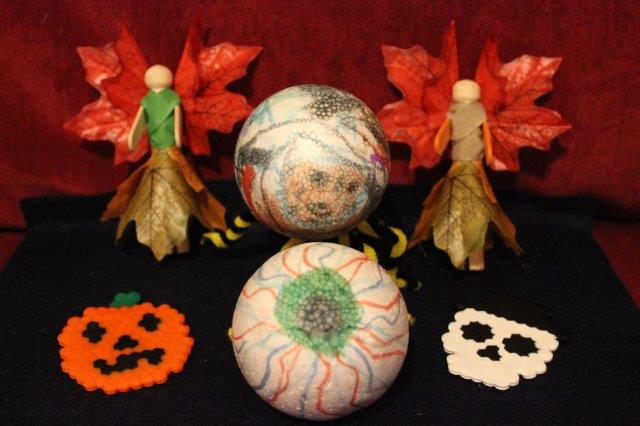
IMG_0520

Autumn Peg Fairies

A slight twist on the standard peg person, these peg fairies look great standing on a shelf or hung upon a tree.

Autumn Peg Fairies

Using the Bostik Glu dots two leaves are wrapped around a peg to create the fairy’s skirt.IMG_0498

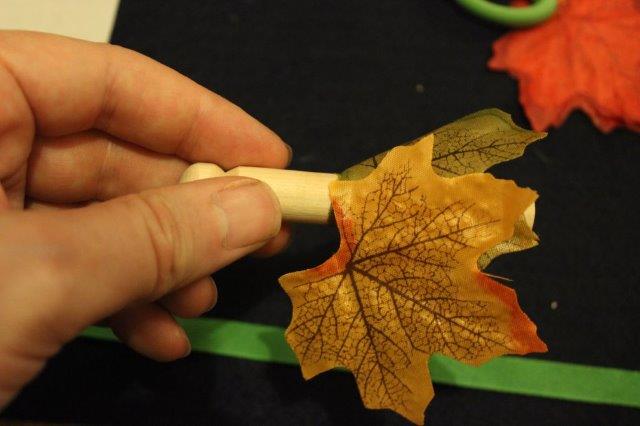
Next cut a lolly stick into a few pieces and secure to both sides of the peg using the Bostik Glu Dots to make arms.IMG_0502

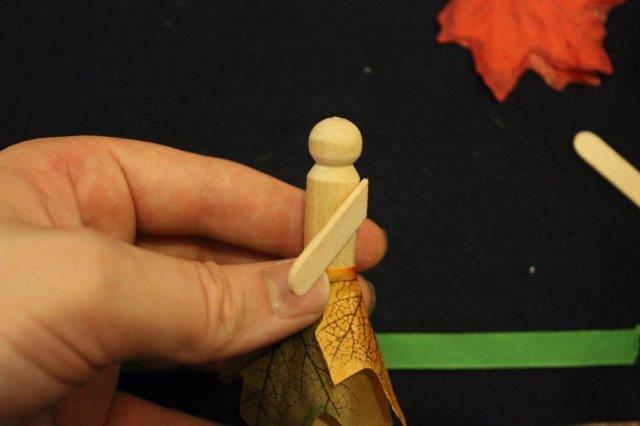
Wrap ribbon around the peg over and under the arms to make the bodice. Secure using the Bostik Glu Pen.IMG_0504

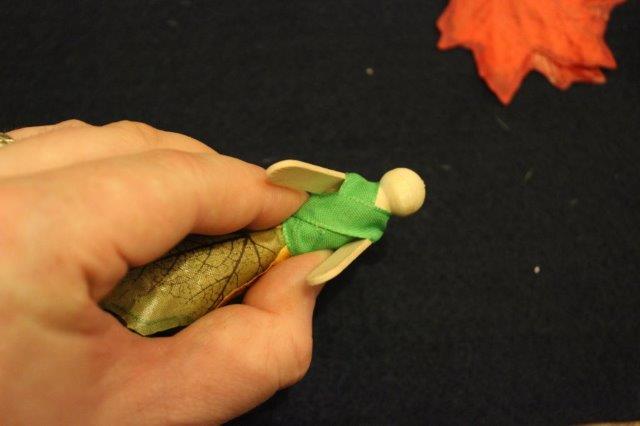
Next two leaves are used to make the wings. Using a Bostik Glu Dot stick part of a leaf down as shown in the following picture.IMG_0505

Stick to the back of your fairy.IMG_0509

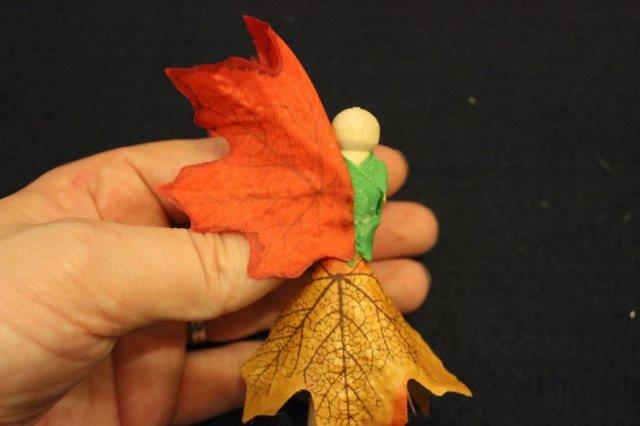
We left our fairies looking simple, but of course you could create hair using wool and draw on a face.

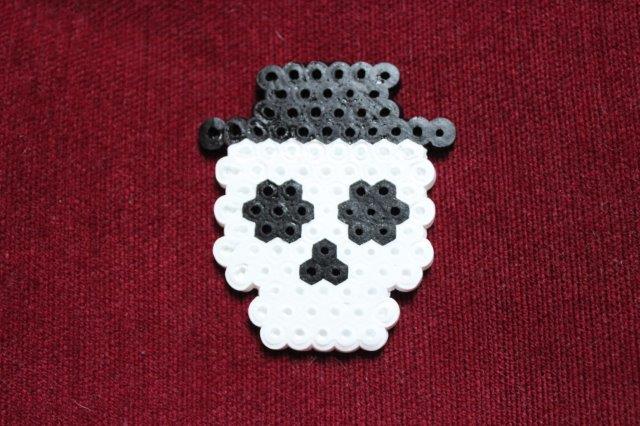
Pumpkin & Skeleton Decorations

Made with specially designed beads these pumpkin and skeleton designs are the work of my son and husband. They could also be used as seasonal coasters.

IMG_0516

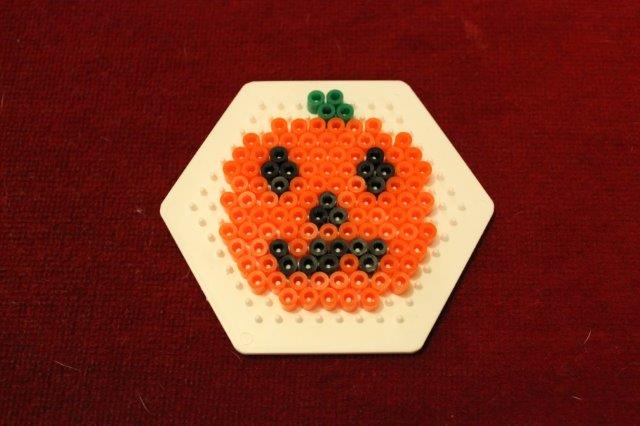
The beads are arranged in your chosen design upon a board. A piece of greaseproof paper is then laid upon the design and ironed. The iron melts the beads which joins them together.

IMG_0527

Spider Monster and Eyeball Decorations

IMG_0525

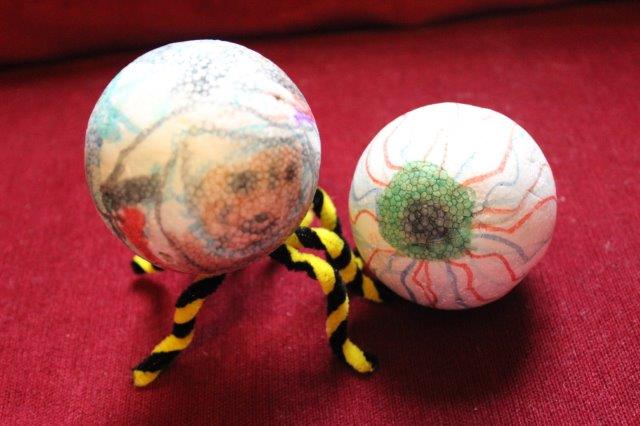
My daughter and youngest son made these designs by colouring in polystyrene balls. The spider monster then had pipe cleaners pushed into place and secured using the Bostik glu pen to make legs. They are very proud of their spooky creations.

This Old Thing – Vintage Patterns

this-old-thingIf you’ve been watching Channel 4 recently then chances are that you caught a bit of Dawn O’Porter’s new show ‘This Old Thing’. In it Dawn tries to convince vintaphobes (my new word, do you like it?) to swap their brand new mass produced clothing for the unique wonders of vintage. She’s mostly successful and is certainly introducing a whole new group to second-hand (excuse me vintage) clothing.dawnoporter_2954682b

As for myself I’ve always had a bit of a love hate relationship with ‘vintage’. I love historical fashions (I’d be dressed in a bonnet everyday if I could!) and I love being unique so vintage definitely appeals. However I don’t always love vintage stores, I’ve visited several which were cramped, badly lit, musty smelling and generally uninviting. However all of that would be nothing if I bagged a real vintage treasure, unfortunately many are now overpriced and underwhelming and their idea of good quality clearly differs from my own.

On the flip side when vintage is done well, enticing stores with bright colours and enthusiastic staff, it can be incredibly exciting. Only the other day I was bouncing about my house with glee having found a 1970s Clothkits dress in perfect condition and it cost me the princely sum of £8!

However I have an unwavering passion for vintage patterns! With them I can create wonders from the past with my own two hands, I could even use vintage fabric if I wish. The end result is just as unique, and even better, I can tailor things to my own choice and size. I could even make them again!

patternRecent acquisitions include a wonderful collection of knitting patterns. I can actually remember many of these sitting about the houses of my relatives. The best creation by far though is a wonderful Teddy pattern that my Granny knitted for my brother when he was a baby.snidneys2

The Teddy was named Sidney and was dearly loved. Unfortunately my brother (being a baby and all) had the audacity to throw up on him and thanks to a trip in the washing machine he stretched and never looked the same. Despite this Sidney became something of a phenomenon in my little village and before we knew it Sidneys (all named after the original) were popping up everywhere, knitted loosely to resemble our stretched one. Of course what none of those knitting Mommas knew was that Sidney was named by my Father after Sid Snot who was one of Kenny Everett’s many characters!snidneys2-crop

I picked up my needles recently and knitted my bro a brand new bear. However what I hadn’t expected was the size difference between the new bear and the original, it goes to show what a washing machine can do to hand knitting. If it hadn’t been for this gorgeous vintage pattern Sidney would have spent the rest of his days alone but now he has a significantly smaller brother to keep him company.

So I guess Dawn is right, there’s still life in This Old Thing. 🙂


Boden Place Mat Tutorial!

Family gatherings or dinner parties with friends aren’t just about the food, dressing the table plays a big part in proceedings and this tutorial teaches you how to sew your own placemats! I originally wrote this for the Boden Community which has now become the Boden Blog. You might still be able to find it if you look through the archives, but it’s much quicker to share it direct with my readers over here.

Boden Placemats

Boden Placemats


Home-made accessories give a wonderful feeling of accomplishment, plus they make fabulous presents if you’re going home-made this Christmas. Armed with a bundle of gorgeous Boden fabric I’ll show you just how I made mine. It’s a very quick method that will have you whipping up mats in no time at all.

placemat2

What You’ll Need (for one Mat)

23cm X 15cm piece of fabric (for the middle panel)

Two 23cm X 6cm pieces of fabric

Two 25cm X 6cm pieces of fabric

Matching Thread

Wadding

Backing Fabric

Step 1

Begin by pinning and sewing the two shorter (23cm X 6cm) pieces of fabric, one to each side of the longer edges of the middle panel. I used a small seam allowance, approximately ½cm.

placemat3

Step 2

Iron the seams open and then sew the two longer strips to the side edges (this now includes the middle panel and the two fabric strips from step 1). Iron the seams open.

placemat4

Step 3

Cut a piece of wadding and backing fabric the same size as your placemat piece is currently. Put the backing fabric down right side up. Add the placemat piece on top right side down (so the right sides of backing and placemat are facing). Then finally place the wadding on the back of the placemat piece. Sew all three pieces together leaving a 5cm gap in one side, this allows you to turn your mat the right way out. Once sewn, trim the wadding back close to the stitches and cut across the corners.

placemat5

Step 4

Turn the mat the right way out and iron. Iron and pin where you left the gap and then machine stitch close to the edge all the way around the mat. I also stitched around the middle panel to keep the three layers neatly in place.

placemat6

All you need to do now is repeat the steps above and make as many placemats as you like!


Boden Placemats

Boden Placemats