Halloween Ghost Decoration Craft for Kids

halloweenbosmain

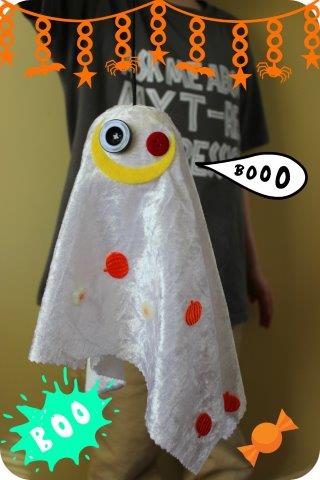
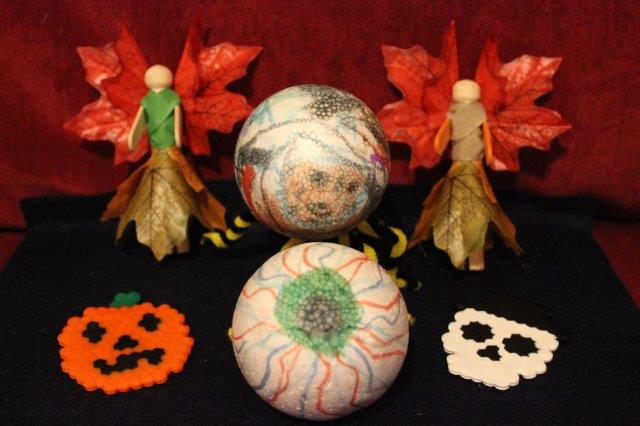
Boo!! Did I scare you?? Probably not but as Halloween is nearly upon us I thought I better give it a go. I’ve never been keen on the gory side of Halloween and my children don’t particularly like being scared but we’re all for Pumpkin carving, apple bobbing and other child friendly activities. As a Bostik craft ambassador I get to create child-friendly crafts every month, so this month it had to be a Halloween Ghost Decoration Craft for kids. This one (made by my son) has been named ‘Bounce!’

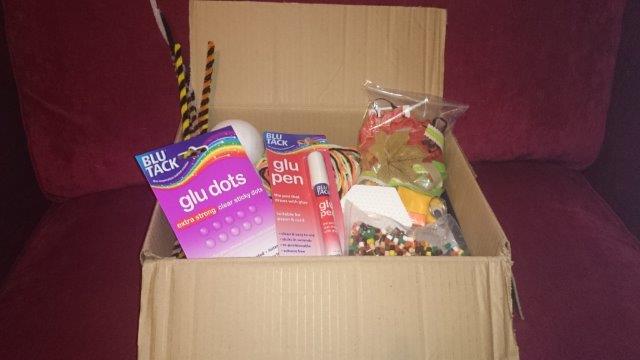
To make your own spooky pal you’ll need

Some fabric

Polystyrene ball

Bostik Glu dots

Bostik Sew simple glue

Buttons

Felt (to make a mouth)

Decorations – we used pumpkin ribbon and fusible beads

Elastic cord

Keyring

halloweenbos2

Step 1

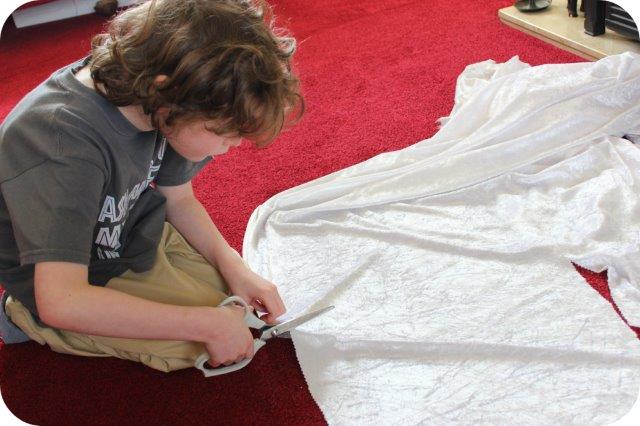
Start by cutting a rough square out from a piece of fabric. We used pinking shears as it prevents fraying and give the ghost a wiggly edge. Turn the fabric over so that the wrong side is facing up.

halloweenbos3Step 2

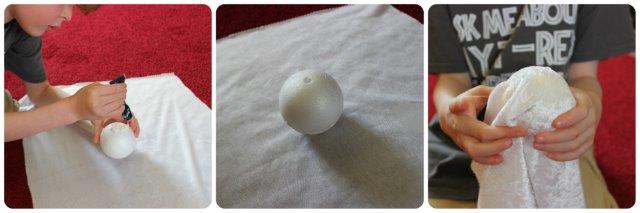
Nest cover half of the polystyrene ball with Bostik sew simple glue. Stick into the centre of your fabric and then gather the fabric around to stick into place.

halloweenbos4Step 3

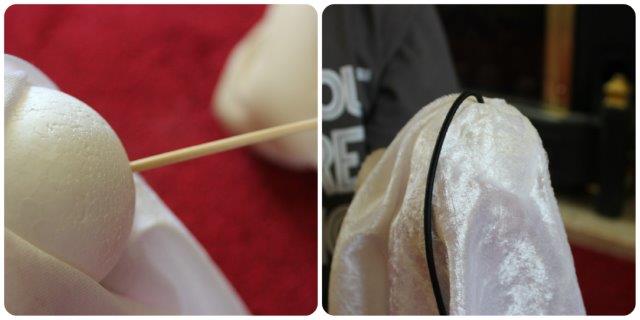
Using a cocktail stick or sewer make a hole through the fabric into the polystyrene ball (might need an adult to do this bit). Stick in some elastic cord using the sew simple glue. We used black cord so that it wouldn’t show up at night. Now leave to dry.

halloweenbos5Step 4

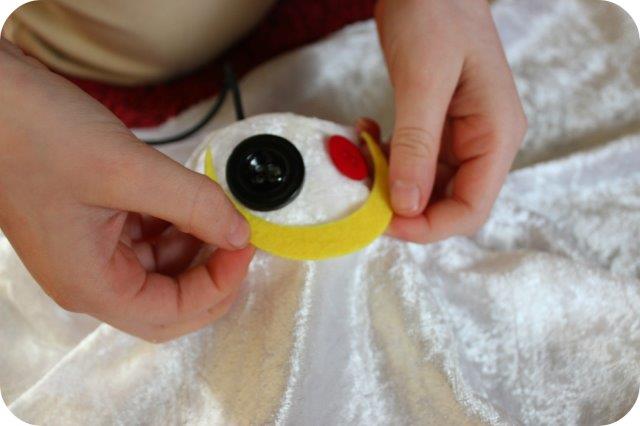
Stick two buttons onto the fabric using Bostik glu dots. We used one larger and one smaller and two different colours to give our ghost a bit of character!

halloweenbos6Step 5

We used a moon shaped felt sticker to make the mouth, you could of course cut one out.

halloweenbos7Step 6

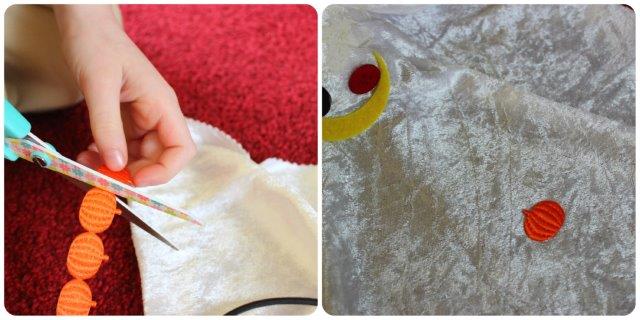
It’s time to decorate! My son cut small pumpkins off pumpkin trimming and stuck to the ghost using the sew simple glue.

halloweenbos8Step 7

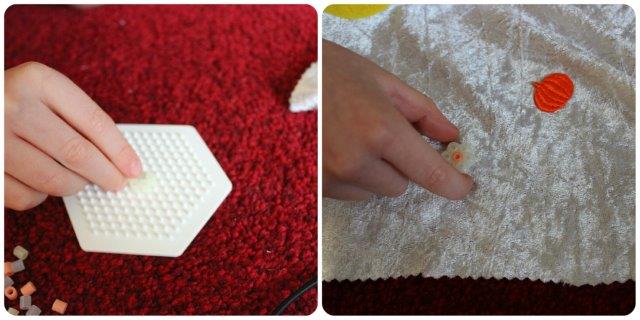
Next he made some simple shapes from glow in the dark fusible beads (which Mummy ironed!) and these were stuck to the ghost using Glu dots.

halloweenbos9Step 8

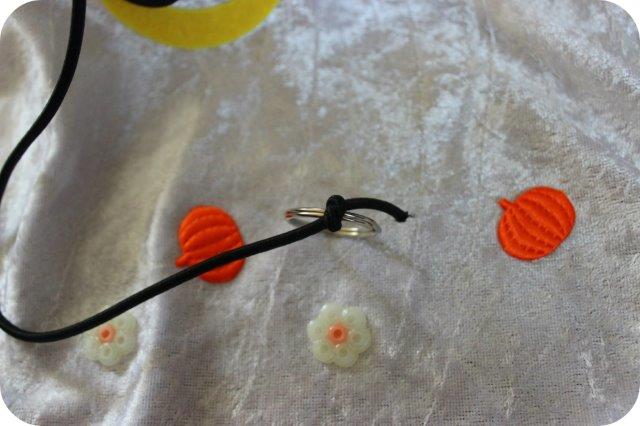
Tie the elastic cord onto a keyring and your new friend is ready to play!


Autumn and Halloween crafts with Bostik!

The nights are closing in and cold air is sweeping through our homes, Autumn is definitely here! There’s no need to be downcast though, less time out playing means more time indoors crafting for all members of the family. Today I’m showing you some fun Autumn and Halloween crafts that your kids are bound to enjoy. As part of the Bostik Craft Bloggers Network I receive a regular box of themed goodies that let my kids and I enjoy a great afternoon coming up with interesting ideas that are fun to make.

DSC_0209This month our box contained:

Pegs

Lolly Sticks

Pipe Cleaners

Faux Leaves

Bostik Glu Dots

Bostik Glu Pen

Ribbon

Polystyrene Balls

Melting Beads

Greaseproof Paper

Here’s what that lovely box turned into:

IMG_0520

Autumn Peg Fairies

A slight twist on the standard peg person, these peg fairies look great standing on a shelf or hung upon a tree.

Autumn Peg Fairies

Using the Bostik Glu dots two leaves are wrapped around a peg to create the fairy’s skirt.IMG_0498

Next cut a lolly stick into a few pieces and secure to both sides of the peg using the Bostik Glu Dots to make arms.IMG_0502

Wrap ribbon around the peg over and under the arms to make the bodice. Secure using the Bostik Glu Pen.IMG_0504

Next two leaves are used to make the wings. Using a Bostik Glu Dot stick part of a leaf down as shown in the following picture.IMG_0505

Stick to the back of your fairy.IMG_0509

We left our fairies looking simple, but of course you could create hair using wool and draw on a face.

Pumpkin & Skeleton Decorations

Made with specially designed beads these pumpkin and skeleton designs are the work of my son and husband. They could also be used as seasonal coasters.

IMG_0516

The beads are arranged in your chosen design upon a board. A piece of greaseproof paper is then laid upon the design and ironed. The iron melts the beads which joins them together.

IMG_0527

Spider Monster and Eyeball Decorations

IMG_0525

My daughter and youngest son made these designs by colouring in polystyrene balls. The spider monster then had pipe cleaners pushed into place and secured using the Bostik glu pen to make legs. They are very proud of their spooky creations.