
Well alright, maybe not a thousand but this truly is a very useful little drawstring bag that you can adapt easily to fit your needs. Here are some of our suggestions:
Use it as a small gift bag, instantly making any gift look special.
Place herbs inside it and hang it up to make an attractive room fragrance.
Use it to keep your jewellery in.
Make it slightly larger and it could be used as a perfect bridesmaid bag.
Again make it slightly larger and using glitzy fabric, easily make yourself an evening bag.
What You’ll Need
Fabric in two designs for outside and lining
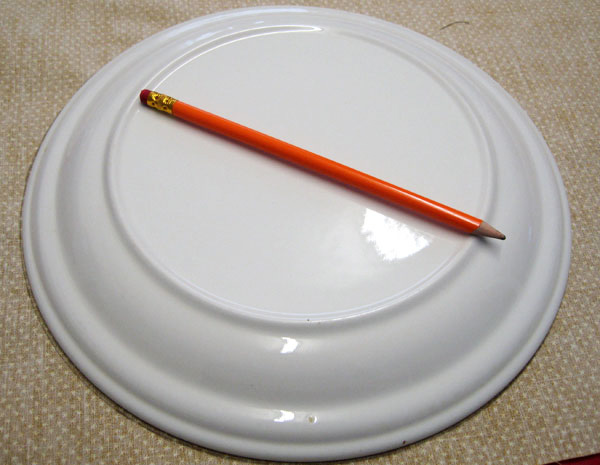
Dinner Plate
Pencil
Cord or ribbon
 Step 1
Draw around your dinner plate on both your outside and lining fabric. Cut along your pencil lines so you have two circles of the same size. These usually look good if one fabric is paler than the other.
Step 2

Place the circles right sides together and pin around the edge.
Step 3
Sew around the edge of the circle (this can be by machine or hand). Remember to leave a gap so that the fabrics can be turned the right way out. Clip around the edge of the circle at approximately 5cm (2″) intervals.

Step 4
Turn the circles the right way out and sew the gap closed. Next iron your circular mat flat.
Step 5

Now we need to create a channel for the drawstring cord to go through. Begin by sewing around the circle approximately 1 1/2cm from the edge. Sew a complete circle with no gaps and make sure to sew back and forth at the beginning and end of the circle to reinforce. Now we sew another smaller circle, approximately 1cm in from the circle we’ve just sewn. Again no gaps and sew back and forth.
Step 6
Now we need to make two small cuts in our new channel so we can push the drawstring in. Cut on either side of the circle so that they face each other. It’s wise to sew a few stitches around the edges of these cuts to reinforce them.

Step 7
Now cut two pieces of cord (or ribbon), I particularly like using colour co-ordinating cord here. We now need to thread the cord through one hole and bring it around the entire circle and back out the same hole. With the other length of cord you need to thread it through the opposite hole and again pull it through the entire circle and back out. Either side is then knotted together. Tip. If you find it difficult to thread the cord through, a hair grip attached to one end of the cord can make the process easier.

Step 8
 Pull your cords together and you have your completed bag! You can also turn it the other way out and it still works very well.

29 Comments (Leave a comment)