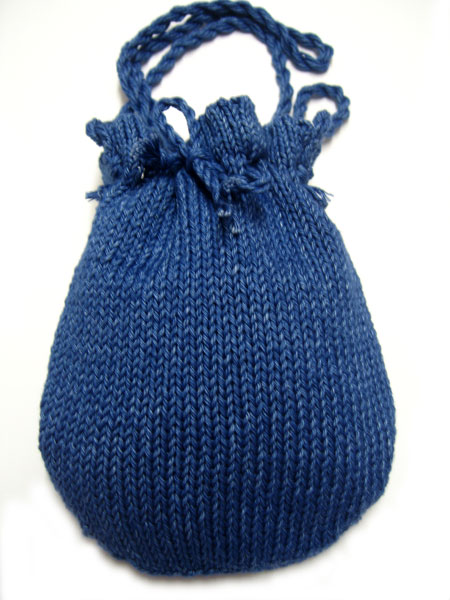
You can ask anyone who knows either Anne or myself and they will tell you that we love bags! Whether handmade or bought we’re regularly seen sporting new ones. Today I thought I’d bring you our tutorial to make a Knitted Bag. It is very versatile, add a long strap to wear across your body, make a smaller one for a evening bag worn from the wrist. It’s also great for little girls (my daughter has commandeered the one shown in the pics here).
What You’ll Need
3 1/4mm Knitting Needles
4mm Knitting Needles
A Ball of Double Knitting Wool (We used a gorgeous Denim wool here)
Wool Needle
Paper
Fabric for lining.
Step 1
To begin we will knit the body of the bag. Make two pieces exactly the same.
With 3 1/4mm needles cast on 38 stitches, starting with a knit row stocking stitch, (one row knit & next row purl) 8 rows.
Now we will knit our eyelets. Next row with the right side facing, K2, *yfwd, K2 tog, K1; rep from * to end.
Starting with a purl row, stocking stitch 9 rows.

Step 2
Change to 4mm needles.
Next row with the right side facing, K2, *yfwd, K2 tog, K1; rep from * to end.
Starting with a purl row, stocking stitch for 33 rows ending with the right side facing.
Dec 1 stitch at each end of next and the following 3 alternate rows, (30 stitches).
Purl one row.
Dec 1 stitch at each end of following 6 rows and cast off remaining 18 stitches.
 Step 3
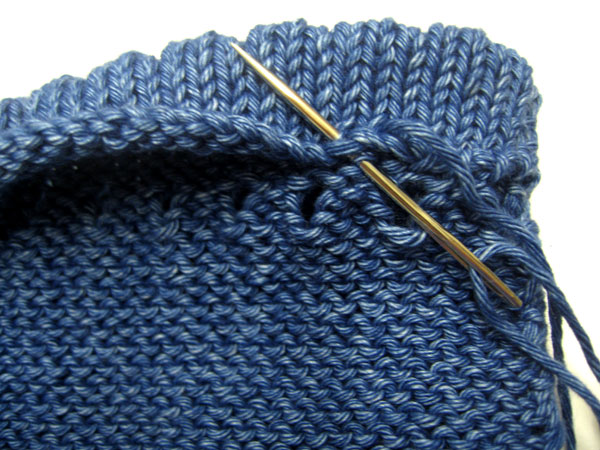
Now we need to lightly press both pieces with an iron under a dry cloth. Then pin the two pieces together with the right sides facing.
Next oversew the bags side seams and bottom cast off edges. Now fold over the top edge of the bag to the wrong side and sew loosely in place just above the holes you knitted to pull the cord through.

Step 4
Now we need to line our bag, this helps it to keep it’s shape while it’s being used. Place your bag on top of some paper and draw around the edge. Then draw another line about 1 cm out from the first line.
Step 5
Cut around the outside line of your pattern piece. Lay it on top of your lining fabric and cut out two pieces.
Step 6
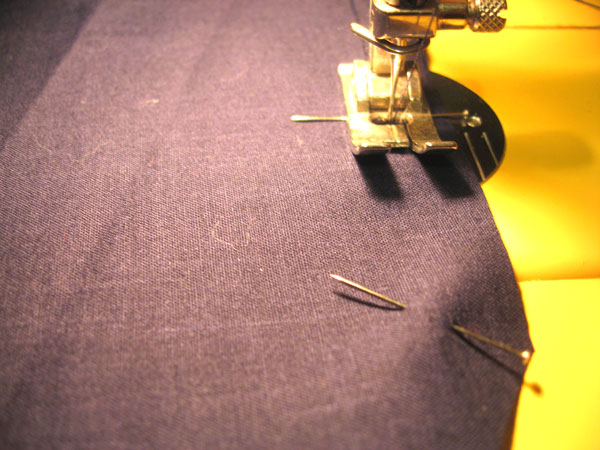
Sew a seam around your lining pieces about 1 cm from the edge. Place the lining bag inside the knitted bag to make sure it fits and them finish off your seams however you like (such as a zigzag stitch).
 Step 7
Now fold over the top of your lining bag to the wrong side. When placed inside the knitted bag the lining should now reach up to the row of eyelets but not beyond.
 Step 8
Place the lining bag inside the knitted bag, all seams should now be hidden and sew into place.
Step 9
Next we need to make the cords to go through the eyelet holes to close the bag and to hang the bag from. You could of course use shopbought cord or ribbon. To make it from the same wool as we have you need to twist 3 strands of wool together. For the eyelet holes we made a cord 54cms long. This was then weaved in and out of the eyelets from the front middle of the bag.

For the strap we twisted 6 strands of wool together and we made it 120cms long. This was then sewn to either side of the bag.
Cord instructions:
Cut the required amount of strands three times as long as you would like your finished cord to be. Knot strands together at each end. Attach one end to something like a door handle and then twist from the other end until the twists are nice and tight. Fold the cord from the middle and it will twist together, tie a knot in each end, then cut the end to give it a tassel appearance.
Ta da you have your bag! If you have any problems just send me an email or leave a comment. Of course I’d love to know how you get on as well 🙂

2 Responses to Knitted Bag Tutorial!