Drayton Manor’s Magical Christmas extravaganza

Helping to launch the Big Bloggers Christmas Giveaway last week has left me feeling remarkably festive and I’m really looking forward to all the upcoming events. One activity in particular has been marked on the calendar in big bold letters and that’s Drayton Manor’s Magical Christmas extravaganza!Drayton's Magical Christmas2

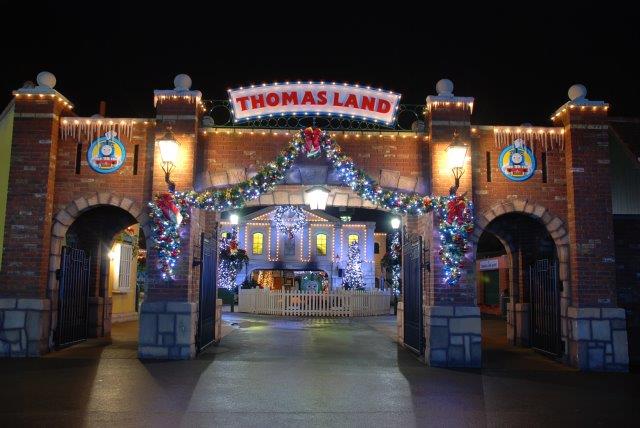
The park closed its doors earlier this month with its awe inspiring War of the Worlds firework display. But we only have to wait until Sat 21st November for it to re-open as a magical winter wonderland.

Thomas Land is due to be draped in decorations, fairy lights and Christmas music, there’s even going to be a snow shower three times a day!!

Drayton's Magical Christmas3As you might expect the whole theme park will not be open, but there will be over 25 rides and attractions still to enjoy in Thomas Land and beyond. Here are some of the highlights:

  • The zoo is always a must see for me and I’m told that the Reindeer are already getting excited to help Father Christmas prepare for the big-day ahead.
  • The Ben 10: Ultimate Mission Coaster is due to run as long as the weather doesn’t drop beneath 5 degrees Celsius.
  • A wondrous outdoor ice rink (there is a £2 charge for 15 minutes)
  • 30 foot lightshow Christmas tree set to music
  • The Apocalypse tower drop is being turned into a 54 metre high Christmas tree (with star on top!)
  • The 4d cinema will be showing a special 15 minute movie experience from the Polar Express

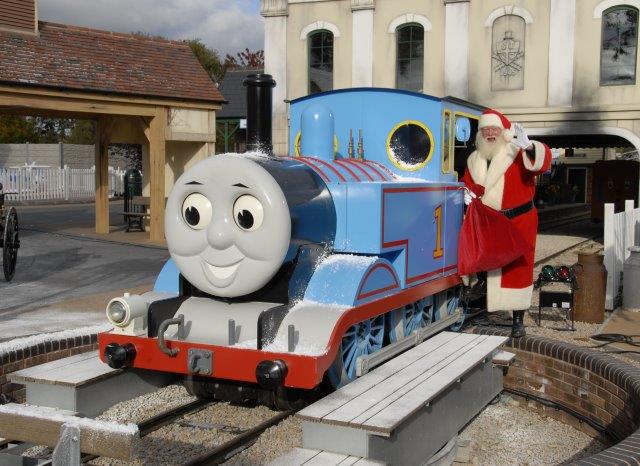
Not forgetting the main event… a visit to the enchanted Castle of Dreams! Cheerful Christmas elves will take visitors through to see Father Christmas and each child will receive a free gift and golden ticket to return for the new season in 2016*Drayton's Magical Christmas1

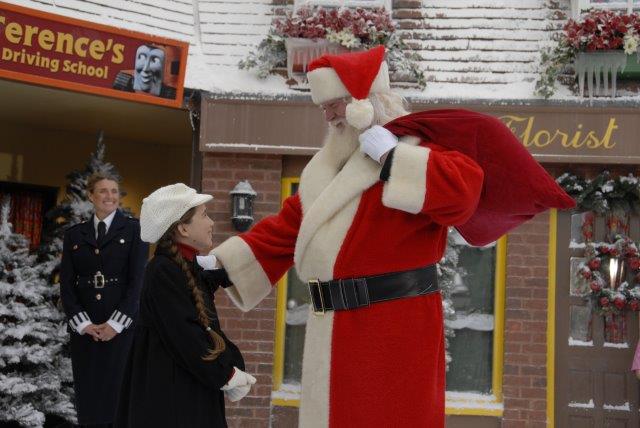
At the end of each day there will be a dazzling firework display bound to leave you bursting with festive cheer.

Drayton Manor recently celebrated winning ‘Best UK Attraction for Children’ award at this year’s Group Leisure Awards – for the eighth time and the second consecutive year! So that alone should be enough reason to visit.Group Leisure award winners - resized

If your children are a little too young or old to visit Santa, you can buy park tickets only, without the Father Christmas visit, with tickets priced at £15 for 12 years and over, and 4 – 11 at £10.

Drayton’s Magical Christmas will be open Fridays, Saturdays, Sundays and Mondays** from Saturday 21st November to Monday 14th December, then every day from Thursday 17th December to Wednesday 23rd December and Sunday 27th December to Thursday 31st December. Pre booking Christmas tickets is essential due to demand.


Please check the website for more information and a complete list of dates and to book your tickets.

* Golden Ticket terms and conditions. The Golden Ticket admits one free child during the 2016 season when accompanied by a paying adult.

**The park will be closed on Monday 23rd November.


Halloween Ghost Decoration Craft for Kids

halloweenbosmain

Boo!! Did I scare you?? Probably not but as Halloween is nearly upon us I thought I better give it a go. I’ve never been keen on the gory side of Halloween and my children don’t particularly like being scared but we’re all for Pumpkin carving, apple bobbing and other child friendly activities. As a Bostik craft ambassador I get to create child-friendly crafts every month, so this month it had to be a Halloween Ghost Decoration Craft for kids. This one (made by my son) has been named ‘Bounce!’

To make your own spooky pal you’ll need

Some fabric

Polystyrene ball

Bostik Glu dots

Bostik Sew simple glue

Buttons

Felt (to make a mouth)

Decorations – we used pumpkin ribbon and fusible beads

Elastic cord

Keyring

halloweenbos2

Step 1

Start by cutting a rough square out from a piece of fabric. We used pinking shears as it prevents fraying and give the ghost a wiggly edge. Turn the fabric over so that the wrong side is facing up.

halloweenbos3Step 2

Nest cover half of the polystyrene ball with Bostik sew simple glue. Stick into the centre of your fabric and then gather the fabric around to stick into place.

halloweenbos4Step 3

Using a cocktail stick or sewer make a hole through the fabric into the polystyrene ball (might need an adult to do this bit). Stick in some elastic cord using the sew simple glue. We used black cord so that it wouldn’t show up at night. Now leave to dry.

halloweenbos5Step 4

Stick two buttons onto the fabric using Bostik glu dots. We used one larger and one smaller and two different colours to give our ghost a bit of character!

halloweenbos6Step 5

We used a moon shaped felt sticker to make the mouth, you could of course cut one out.

halloweenbos7Step 6

It’s time to decorate! My son cut small pumpkins off pumpkin trimming and stuck to the ghost using the sew simple glue.

halloweenbos8Step 7

Next he made some simple shapes from glow in the dark fusible beads (which Mummy ironed!) and these were stuck to the ghost using Glu dots.

halloweenbos9Step 8

Tie the elastic cord onto a keyring and your new friend is ready to play!


Holiday Memories Craft with Bostik

holiday memories craftTodays holiday memories craft tutorial is the perfect way for kids (or adults) to turn all those little mementoes into a hanging wreath to decorate your home.

If your family is anything like mine then you often come home with all kinds of bits and pieces like teeny tiny shells, postcards or even bits of sand. But what do you do with them when you get home? Getting crafty is one way to use those special collections and a door hanging means everyone can appreciate the fun you had. I received the materials used in this craft as part of the Bostik Craft Ambassador program.

What You’ll Need

Cardboard

Foam

Bostik Fine & Wide Glu Pen

Sand

Lolly Sticks

Wooden holiday shapes

Fabric Stickers

Small Shells

Ric rac or ribbon

Small bunting flags

Bostik Glu Dots

Sticky Tape

All the instructions you need are contained in this video or you can follow the text version below.

Step 1

Begin by drawing around a dinner plate onto a piece of cardboard. Draw a smaller circle in the centre (I drew around a roll of tape). Then cut out.

Step 2

Using the Bostik Fine & Wide Glu Pen cover the back of the wreath shape in glue (use the wide end of the pen). Then stick onto a piece of foam or you could use some strong cardboard. Once dry cut out.

Step 3

Using the fine end of the glu pen make swirls, dots or any pattern you fancy all over the front of the shape. Then pop some sand into a cup and sprinkle all over the glue pattern. Once the glue has dried shake off the excess sand.

Step 4

Time for decoration! You can use anything that you collected or that reminds you of your trip, I like to lay everything out before sticking into place. I used Bostik Glu dots to attach plain wooden holiday themed cut outs. Of course you could decorate these, I just think the bare wood looks really good. Next I laid lolly sticks to remind us of all those lovely iced treats and fabric stickers look great, especially if they have googly eyes!

Step 5

Bunting screams summer to me so I made some bunting using ric rac and ready made flags. If you can’t find any pre-made flags an alternative is to cut triangles from fabric and either stick into place or use a hole punch to loop the ric rac or ribbon through. The bunting was stuck to the reverse using sticky tape.

Step 6

Finally I stuck some miniature shells into place using glu dots. Then I used more ric rac to make a hanging loop, this was also stuck to the reverse of the hanging using tape.

Step back and admire your handy work!