‘It is a truth universally acknowledged that a single woman in possession of a paddle of ducks must be in want of a beast shed!’
That might not have been the original meaning of Jane Austen’s famous opening line, but I’m sure she would whole heartedly agree with me 🙂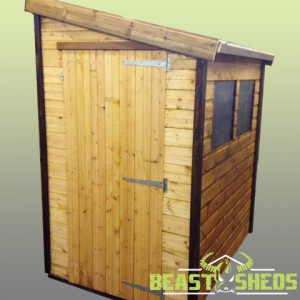
Beast Sheds are wondrously sturdy, safe and secure sheds which take the otherwise humble garden building to a whole new level. When I heard they were giving one away I couldn’t help but tell them exactly what I would do with one should I win. What I wouldn’t do with it is use it as a standard shed!
From childhood I have longed for my own paddling of Indian Runner Ducks, their adorable stature makes them enduringly appealing and I honestly believe they would be a wonderful addition to my garden. I even have names already chosen for them!
As you might have already guessed Jane Austen is one of my favourite authors and I’ve named many a pet after her characters. I’d start with two ducklings who I’d name Kitty and Lydia, their silly antics reminding me of the less refined of the Bennett sisters.
I think the 5X4 Pent Standard Shed from Beast Sheds would make the perfect garden home for my ducks. It comes with two doors giving them a choice of entry or exit sites and inside I could fashion shelves, feeding areas, ladders and more to keep the girls in a style to which an Austen character might like to be accustomed.
Interior Design
 Of course Austen inspired ducks would need to have an appropriately designed abode and I’d look to Country Houses for my inspiration. Jane Austen mentions Chatsworth in Pride and Prejudice and it’s often thought to have been the inspiration for Mr Darcy’s home Pemberley. As I don’t live far from the real Chatsworth, I’m sure I could take a little inspiration from the grandeur of this stately home. Perhaps I could line the shed walls with portraits of famous ducks like Jemima Puddleduck, Daffy Duck or Donald, all in gilt frames naturally. A sumptuously upholstered bed would sit in the corner ready for a daytime repose, a grand staircase decorated with cherubs and mythical characters would lead to the upper level where my ladies could look out of their landscape windows to admire the view of their gardens below.
It will be the grandest, most serene and purposeful shed that any garden has ever known and who knows maybe one day I’ll add a Capability Duck to come and do some landscaping around its borders.


5 Comments (Leave a comment)