How to make a Dragon puppet and Goat for Chinese New Year with Bostik!


How to make a Dragon puppet
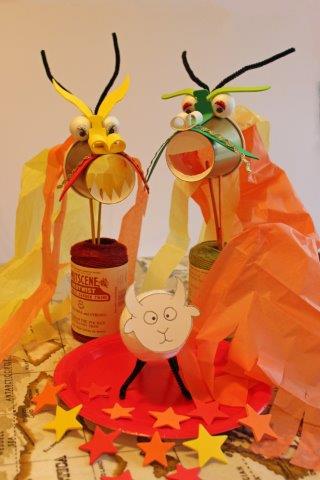
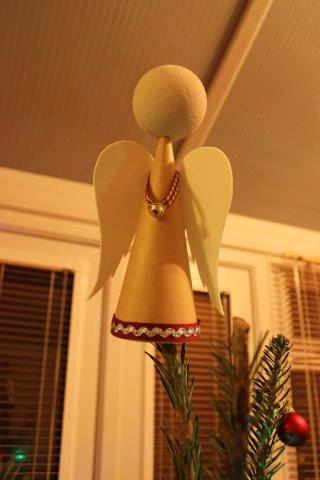
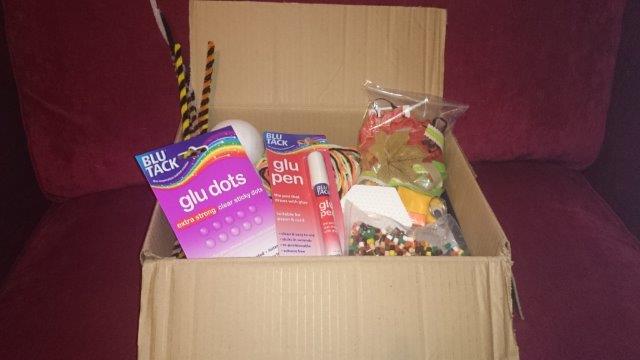
My kids and I have been having so much fun this week making dragons and goats for Chinese New Year (2015 is the year of the Goat). Every month we’re sent a box of random materials as part of the Bostik Craft Bloggers Club with Tots100. As it’s half term next week I bet you guys are looking for activities to keep the little peeps happy, so here’s how to make a Dragon puppet (or windsock) and Goat for Chinese New Year!

Dragon Puppet or windsockChinese New Year Dragon Puppet

These guys have brilliant tails which billow and twirl whether they’ve been propped up to make a windsock or used as a hand-held puppet. They’re also very adaptable which means you can use the same basic design and customise the face etc.
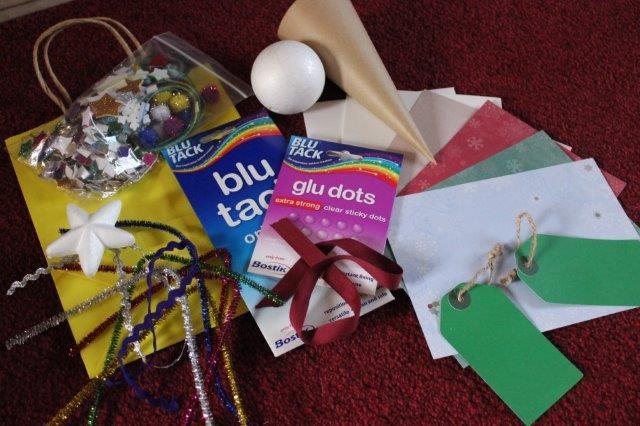
What You’ll Need

Bostik Glu Dots

Paper Cup

Small Polystyrene Balls

Googly Eyes

Foam

Pipe cleaner

Ric-rac or Ribbon

Tissue Paper

Lolly sticks

Sticky Tape

Photos are great when it comes to craft tutorials but I thought it would be easier for this one if I also provided you with a video showing exactly how it’s made. There are also text instructions and a couple of pics below.

Step 1 – Start by drawing and cutting out a mouth from the flat end of the paper cup.

Step 2 – Using your Bostik Glu Dots stick two polystyrene balls to the back of the cup to make eyes. Stick googly eyes on top to finish.deyebrows

Step 3 – Grab some foam (I used foam wristbands) and draw out two eyebrow shapes. Stick these onto the top of the eyes using more Glu Dots.

Step 4 – Pick up the pipe cleaner and fold in half to make the Dragon’s horns. Stick between the eyes using Glu Dots.

Step 5 – Take a short length of foam and fold the ends into the centre to make nostrils. Secure using Glu Dots.

Step 6 – Cut half a moustache out from foam, repeat to make a second half. Cut ric rac or ribbon to the same length or a little longer and use a Glu Dot to stick on top of the moustache.

Step 7 – Stick the nostils onto the thinner end of the paper cup using a Glu Dot. Then stick the moustache into place just under the edges of the nostrils.dface

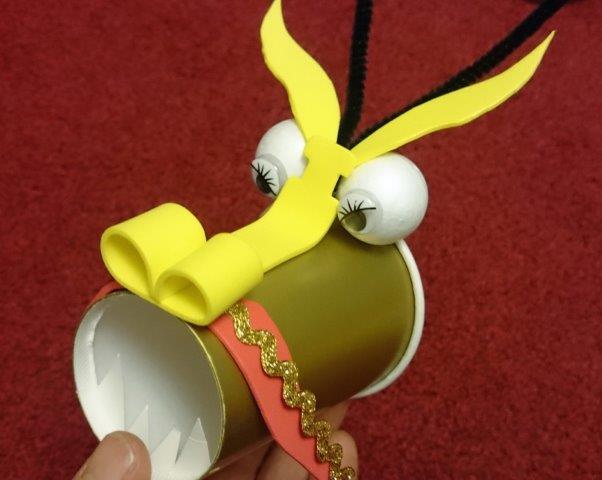
Step 8 – Next cut a length of foam (or half a wristband) and stick to the paper cup behind the nostrils to make the bridge of the Dragon’s nose.dtissuepaper

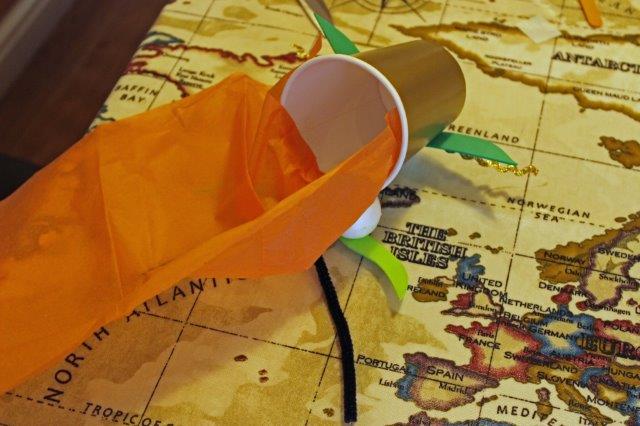
Step 9 – Take some tissue paper and stick to the inside of the paper cup using sticky tape. We also cut out thinner lengths of tissue paper from a contrasting colour to make streamers, stick to the cup.

Step 10 – This next bit is for the adults!! Cut two small holes in the bottom of the Dragon’s face and insert two lolly sticks. Add a third which is placed between the first two and bind together using sticky tape.

Play with your Dragon!

GoatChinese New Year Goat craft

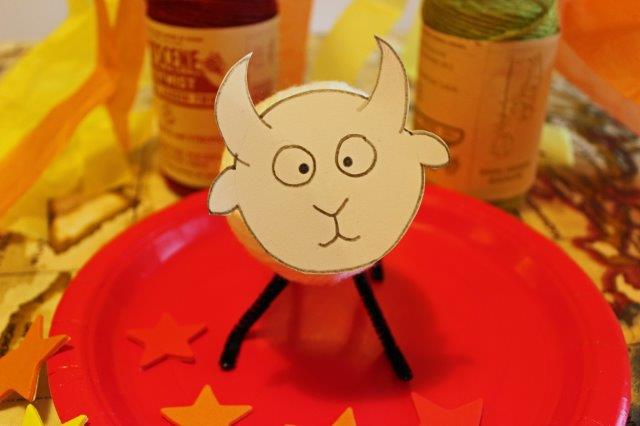
This little guy is really cute and very quick to make!

What You’ll Need

Bostik Foam Pads

1 Polystyrene Ball

Wool

Cardboard

Pipe Cleaner

Pens

goat1

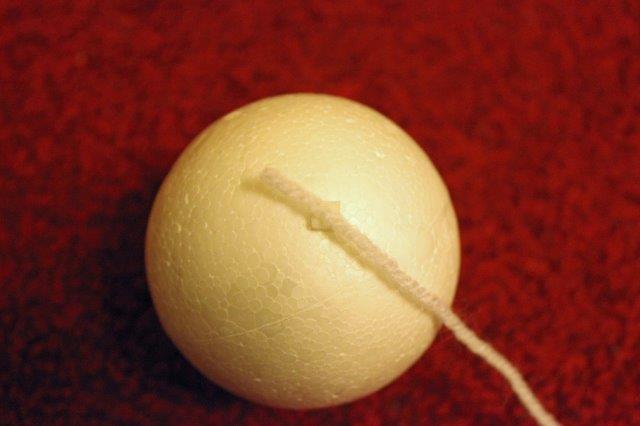
Step 1 – Pick up your polystyrene ball and attach the end of a ball of wool using a Bostik Foam Pad.

Step 2 – Wind the wool round and round until the ball is completely covered. Secure the end by tucking under the wound wool. You can use another Foam Pad or a Glu Dot if needed.goat2

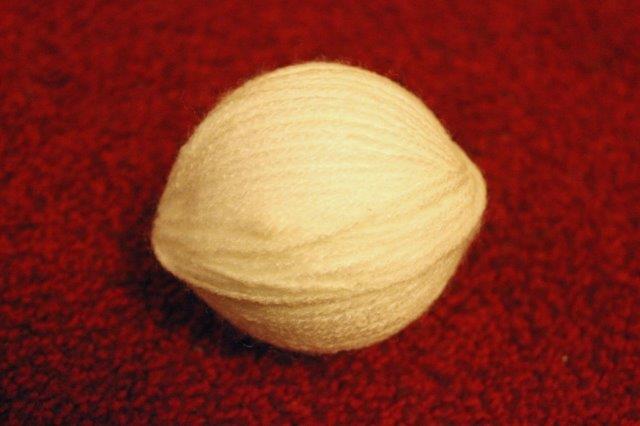
Step 3 – Cut a pipe cleaner into four pieces and bend one end of each piece to make feet. Push these into the ball.goat4

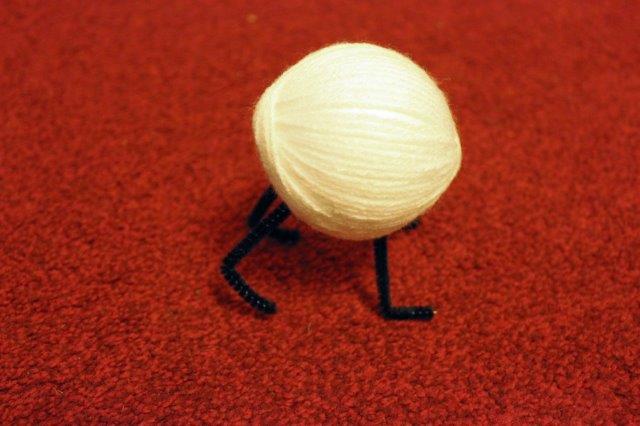
Step 4 – Draw a face for your Goat onto cardboard. Cut out.goat3

Step 5 – Stick onto the front of your ball using Foam Pads and ta-da you have your Goat!

Christmas crafts with Bostik!

Christmas crafts with BostikChristmas is nearly here! The tone of that statement and whether it strikes fear or excitement is often directly correlated with just how prepared you feel for the festive season. Many of us find ourselves flooded with obligations both pleasant and stressful, but if there’s one Christmas tradition I always make time to fit in it’s crafting, especially with my children. So in an attempt to bring a little normality back into our chaotic home (see my previous post!) I bring you our Christmas crafts with Bostik!

IMG_0557-1

As usual our box was jam packed with creative goodies:

Bostik Glu Dots and Blu Tack

Pipe Cleaners and Pegs

Polystyrene Ball & Star shapes

Cardboard Cone

White Foam and Coloured Card

Gift Bag

Ric Rac and Ribbon

Glittery Stickers and Pom Poms

Gift tags

Decorative paper

Small brass bells


What we made:

Christmas Angel

Christmas Angel

The cardboard cone could have become many things but as we had a new Christmas tree sadly lacking a winged friend to adorn the top, an angel was the obvious choice.

I started by cutting the wings out from white foam.

IMG_0559-1

Next I made a hole in the polystyrene ball and pushed it onto the top of the cone to give the angel a head. I painted the head using a mixture of chalk paint colours which gives a lovely soft matt finish, it also dries really fast! It is more commonly used to paint furniture.

IMG_0561-1

Once the paint had dried I used the Bostik glu dots to stick ribbon around the base of the cone (or dress).IMG_0567-1

This was further accessorised with silver ric rac, also stuck using the glu dots.IMG_0568-1

Next her wings needed to be attached. If you want to test to find the best height then use a little of the blu tack. Final adhesion is achieved using the glu dots once again (they really are useful to have at hand).

Finally I used a gold bell (so she can ring out the good news!) looped onto a ribbon to give the angel a pendant. This is attached at the back using yet another glu dot.IMG_0583-1

Gift Bag

My youngest was in charge of the gift bag decoration and chose to use a selection of sparkly stickers to create this festive wonder.Christmas Giftbag

Gift Tags

All three children were given free reign to cut paper, stick pom poms, stickers and anything else they fancied onto our gift tags. We were given two pre-cut tags, but we also used the cardboard to cut more out.

Gift tags

Peg Princess

My daughter made a Peg Princess using ribbon and off cuts from snowflake stickers to make a tiara.IMG_0587-1

We had a wonderful time listening to Christmas music while crafting away and I wholeheartedly recommend it!

Autumn and Halloween crafts with Bostik!

The nights are closing in and cold air is sweeping through our homes, Autumn is definitely here! There’s no need to be downcast though, less time out playing means more time indoors crafting for all members of the family. Today I’m showing you some fun Autumn and Halloween crafts that your kids are bound to enjoy. As part of the Bostik Craft Bloggers Network I receive a regular box of themed goodies that let my kids and I enjoy a great afternoon coming up with interesting ideas that are fun to make.

DSC_0209This month our box contained:

Pegs

Lolly Sticks

Pipe Cleaners

Faux Leaves

Bostik Glu Dots

Bostik Glu Pen

Ribbon

Polystyrene Balls

Melting Beads

Greaseproof Paper

Here’s what that lovely box turned into:

IMG_0520

Autumn Peg Fairies

A slight twist on the standard peg person, these peg fairies look great standing on a shelf or hung upon a tree.

Autumn Peg Fairies

Using the Bostik Glu dots two leaves are wrapped around a peg to create the fairy’s skirt.IMG_0498

Next cut a lolly stick into a few pieces and secure to both sides of the peg using the Bostik Glu Dots to make arms.IMG_0502

Wrap ribbon around the peg over and under the arms to make the bodice. Secure using the Bostik Glu Pen.IMG_0504

Next two leaves are used to make the wings. Using a Bostik Glu Dot stick part of a leaf down as shown in the following picture.IMG_0505

Stick to the back of your fairy.IMG_0509

We left our fairies looking simple, but of course you could create hair using wool and draw on a face.

Pumpkin & Skeleton Decorations

Made with specially designed beads these pumpkin and skeleton designs are the work of my son and husband. They could also be used as seasonal coasters.

IMG_0516

The beads are arranged in your chosen design upon a board. A piece of greaseproof paper is then laid upon the design and ironed. The iron melts the beads which joins them together.

IMG_0527

Spider Monster and Eyeball Decorations

IMG_0525

My daughter and youngest son made these designs by colouring in polystyrene balls. The spider monster then had pipe cleaners pushed into place and secured using the Bostik glu pen to make legs. They are very proud of their spooky creations.