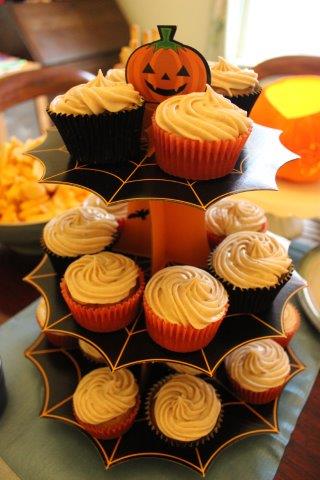
Custard Brioche Recipe

This recipe was a recent accident happened upon by my husband and myself. While attempting to make another dish entirely I merrily added all the wrong things, in all the wrong order and ended up in a complete muddle. I had created a sweet dough, although I wasn’t sure what to do with it. My husband being the resourceful type immediately grabbed for a can of powdered custard and created this wonderful dessert. It has since made appearances at parties, work functions and has become a fast favourite. In this instance it was a most fortunate mistake.

What You’ll Need

300ml/ 10 fl oz Milk

600g/ 1lb 5oz Plain Flour

75g/ 3oz Unsalted Butter

1 Tsp Salt

2 Tbsp Caster Sugar

1 Large Egg

1 dried yeast packet (7g)

Custard

Icing Sugar

Hot Water

Step 1

In a pan heat the milk and butter together until the butter has melted. Leave to cool slightly. In a large bowl mix together 500g of the flour with the salt and sugar. Beat the egg into the milk and butter mixture.

Step 2

Mix the yeast into the flour mixture. Slowly start to pour the milk mixture in to combine. Once combined, slowly add the remaining 100g of flour to make a dough. We knead our dough in a stand mixture for around 4-5 mins, you can also knead by hand but it will take a few minutes longer. Return the dough to a mixing bowl, cover and leave to rise in a warm place for an hour.

Step 3

While the dough is rising make up a quantity of custard (the exact amount is down to personal preference). Leave to cool slightly

Remove the now risen dough and place onto a lightly floured surface. Roll out to make a long rectangle. Spread the custard across the dough. Slowly roll up the dough (like you would a Swiss Roll). With a sharp knife slice the dough into little rolls. Arrange the rolls in a prepared tin, cover and leave to rise in a warm place for an hour.

Step 4

Place into a preheated oven 180C/ 350F/ Gas Mark 4 for 20-25 mins. Once cooked leave to cool. Mix up some simple icing using icing sugar and hot water. Trickle across the cooled brioche. Now all you need to do is cut a slice and enjoy!

CSN Store Cupcake Review

You may remember me mentioning a couple of weeks ago that CSN stores had contacted me to ask if I would like to review some items from one of their stores. I was really excited about this, I didn’t get paid to write the review but I did get to choose a few goodies to have a play with and I can now share the results!

What I Chose

I chose three items from the www.cookwarebycsn.co.uk store. There was a lot to choose from, but I finally settled on:

The Chicago Metallic 12 Cup Dainty Daisy Cupcake Tray

The KitchenCraft Ciroa Miniamo Cupcake Wire Tree

and The Rushbrookes Piping (Set of Ten)

Delivery

Each item came seperately and delivered by UPS. Delivery was also free at the time I ordered. I liked the fact they used UPS, I’ve always found them to be a careful delivery service and if you’re out they’ll try and leave it with a neighbour so you don’t have to wait for redelivery or go and pick up your parcel from a depot.

Using The Items

This is what I received. The real review is about using them and not just admiring their pretty packagaing, although the wire cake tree box does look beautiful :)

First I decided to put the wire cupcake tree together. I’ve seen similar items before in places like Lakeland (quite a bit more expensive there though I think) but always wondered if they were either hard to put together or really wobbly. When I opened the box I was pleased to see only three pieces to make the tiers and a long metal rod with a screw either end and two metal tubes.

Basically you attach the rod with a screw into the base piece, slide a tube over, put on the second tier, slide the other tube over and screw on the top piece. No screwdrivers or much arm muscle required (which is a bonus as I have none!) I am happy to report that the assembled tree was very sturdy, I honestly thought it might be wobbly but no, it’s really quite solid!

Next I decided to tackle the Daisy Cupcakes. I was a little apprehensive when I saw the moulds as the top of the cupcake is wider than the bottom. Techincally the tray is non stick, but as I’ve never had much luck with non stick I crumbled and brushed each cupcake mould lightly with melted butter, then spinkled over a tiny bit of plain flour (shaking off the excess). I filled them quite full to make sure they spread right to the top to make the petals.

They came out beautifully, petals and all! At this point I had to hold the children off from eating them all before decoration.

When they’d cooled I set about icing them. I’m not usually an icing bag fan, I prefer the syringe style icer so this was quite new to me. The set is quite small, with fairly large attachments, so not for fine icing work, but perfect for chunky cupcakes. You do have to fill the bag quite full, but then it’s easy enough to move about. I did get the kitchen side in a glorious mess while I filled it up though :D The bag is also plastic lined so easy to clean.

Finally I thought I’d show you the finished effect. I should apologise here for the lack of Daisy Cupcakes, only the top tier survived, little hands couldn’t resist and all the cute daisies were snaffled before I could take a pic. So they now take pride of place at the top with smaller cakes at the bottom.

I will definitely be using all these items again. If I had to pick a favourite though it would be the cupcake stand, it’s so cute and can hold 23 cakes, perfect for a party! So www.cookwarebycsn.co.uk definitely get a thumbs up from me :)

A Little Less Silver & A Little More Sugar

We’ve had a change of pace here at Angel Eden, we downed the jewellery tools and reached for the rolling pin. With a party fast approaching we were thrown into full throttle preparation and I thought it would be a lovely idea to share some of our discoveries with you all.

Of course there was the obligatory cake, with a woodland theme we decided a mushroom shaped cake was really the thing required.

This was made from a medeira cake spread with buttercream and then covered in fondant icing.

One tip I have here is the buttercream, if like me you thought buttercream always consisted of just icing sugar and butter, then you’d be wrong. The buttercream here is the best I’ve ever made, here’s the recipe:

4oz Butter
12oz icing sugar
1 tbsp milk (yes milk!)

it gives the perfect consistency and tastes delicious!

After the cake came biscuits. I’ve always loved the idea of beautiful biscuits, but icing always runs, or stays too tacky leaving it fragile and easily squashed. I looked to the internet and discovered run sugar. This is essentially royal icing but with more water. It therefore dries hard and is very easy to work with. The recipe came from america and includes an item called meringue powder, if you’ve never heard of this it’s wonderful stuff. Thankfully my local cake shop sold it, but it is also widely available to order online. Let us know if you try any of these ideas out and have fun!

Here’s the recipe:

1 lb + small 1/4 cup icing sugar
5 Tbsp meringue powder
1/2 cup cool water
A few drops of paste food coloring

The results: